Input System - Basic Input for OpenXR for Mobile
As the bridge between the player and the game, input is the decisive factor for how the player interacts with the game. By using Focus 3, there are countless ways for the player to interact with the game content, such as eye-tracking, hand-tracking, facial-tracking, Bluetooth gamepads and controllers. With features provided by VIVE, there are many possibilities available to the developer.
In this chapter, you will learn about the basic input device in all VR headsets - controllers, and how to handle the input from the controllers in Unity using the new Input System.
In Unity, there are two input systems, the old Input Manager and the new Input System. The old Input Manager provides APIs that some Unity users might be familiar with, as shown below.
Input.GetAxis(“Vertical”)


Input.GetKey(KeyCode.UpArrow);


Input.GetButton(“Jump”);
The Input Manager is simple, intuitive and easy to use. However, it also means it is hard for the developer to handle complex input, like supporting keyboards and gamepads at the same time, or to remap the input. To combat these pain points, Unity introduced the new Input System.
In the new Input System, input of devices is bound to actions instead of the code. This way, developers only have to handle the action triggered by the player, without the need of knowing which device or what button the action is associated with (bound to). As a new field with various input devices, it is easy to understand why Unity chose to use the new Input System to handle the input in XR.
In this chapter, you will learn:
- Basic knowledge of the controller.
- How the Input System works.
- How to use the Input System (Settings and Code) in VR contents.
Create an Action Asset
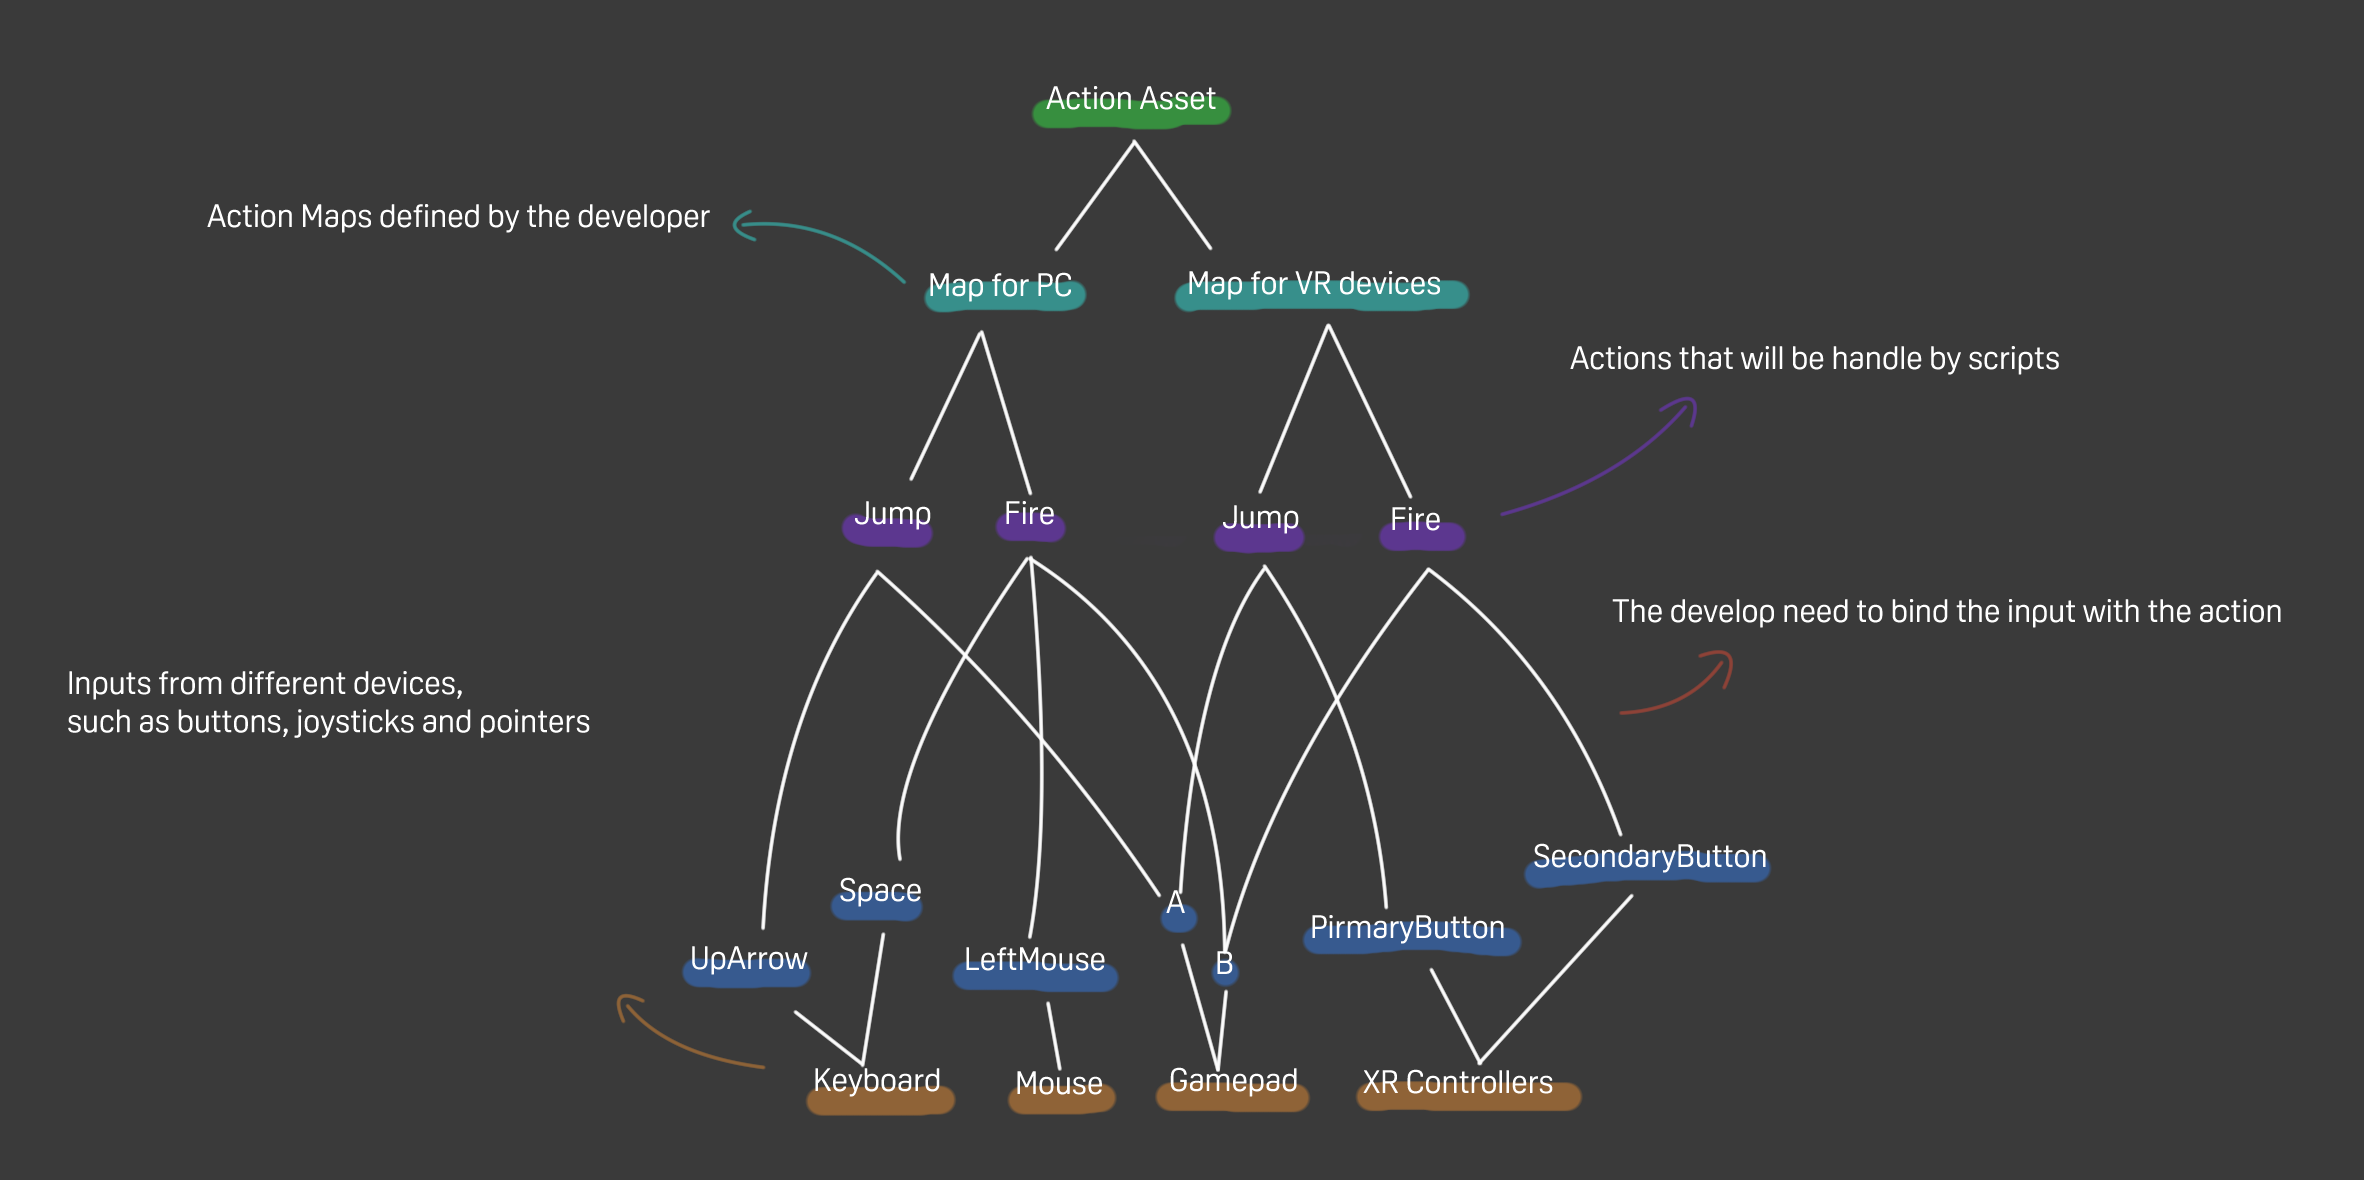
To use Input System, an action asset needs to be created. Action assets are defined by the developer themselves. In each action asset, there are several action maps also created by the developer. In each action map, different actions are created and bound to different input. Instead of handling the device input, the developer only needs to handle the actions in the enabled action asset.
Step1. Create an action asset
Step2. Create an action map and an action
Step3. Bind the action to the A key
Handle input using the action asset
Step1. Download sample action asset and put the sample action asset into the project
Step2. Use the InputSystem namespace
using UnityEngine;
using UnityEngine.InputSystem;
Step3.
Declare the ActionAsset and InputActionReference
public class MoveCube : MonoBehaviour {

    [SerializeField] private InputActionReference JoyStitckR;

    [SerializeField] private InputActionAsset ActionAsset;

    private void OnEnable()
    {
    	if (ActionAsset != null)
        {
            ActionAsset.Enable();
        }
    }
}
Remember to enable the InputActionAsset before using it.
After the InputActionAsset is enabled, the input data, which is given by the InputActionReference from the action it is associated with, can be used in the script.
Step4. Link the InputActionAsset with the sample action asset and link the InputActionReference with the action (RightHand/Joystick)

Step5. Using InputActionReference to get the input value
Now, by using ReadValue<TValue>, the value of InputActionReference can be used in the code.
void Update()
{
	transform.Translate(JoyStitckR.action.ReadValue<Vector2>() * Time.deltaTime);
}
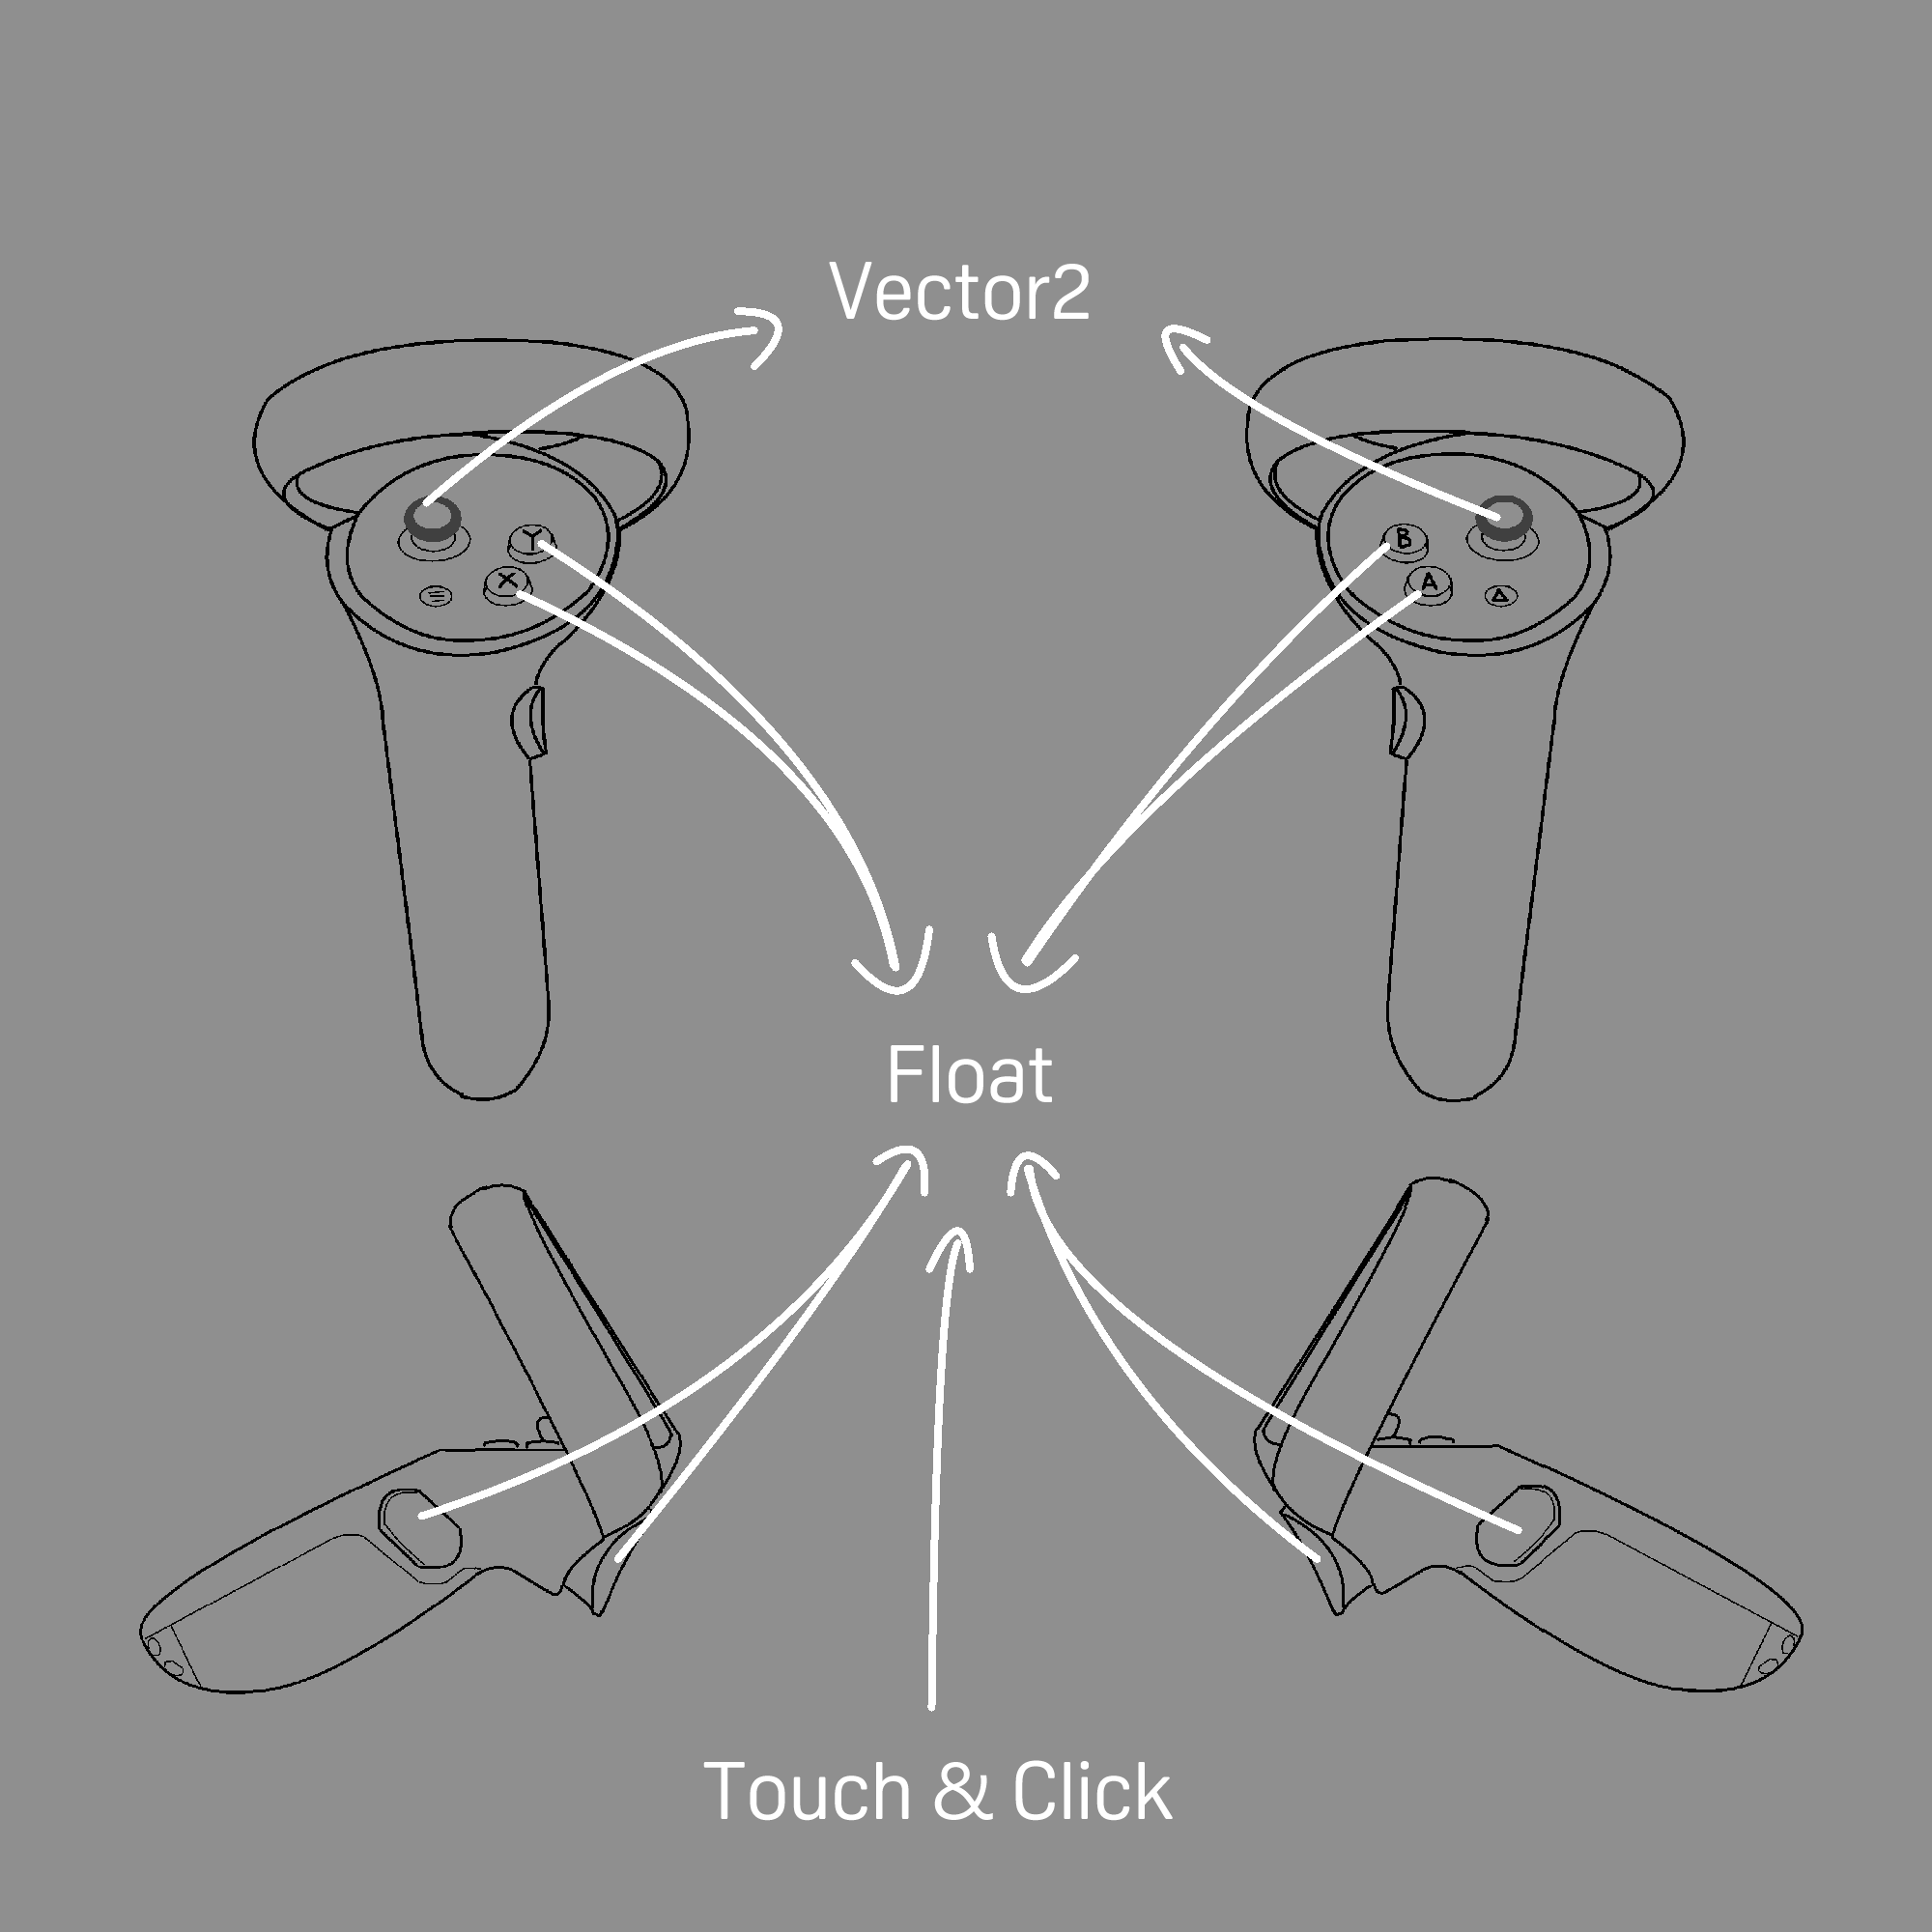
The thumbstick of our controller returns a 2D value, which is held by a Vector2. By giving Translate() the value, we can move the GameObject this script is attached on.
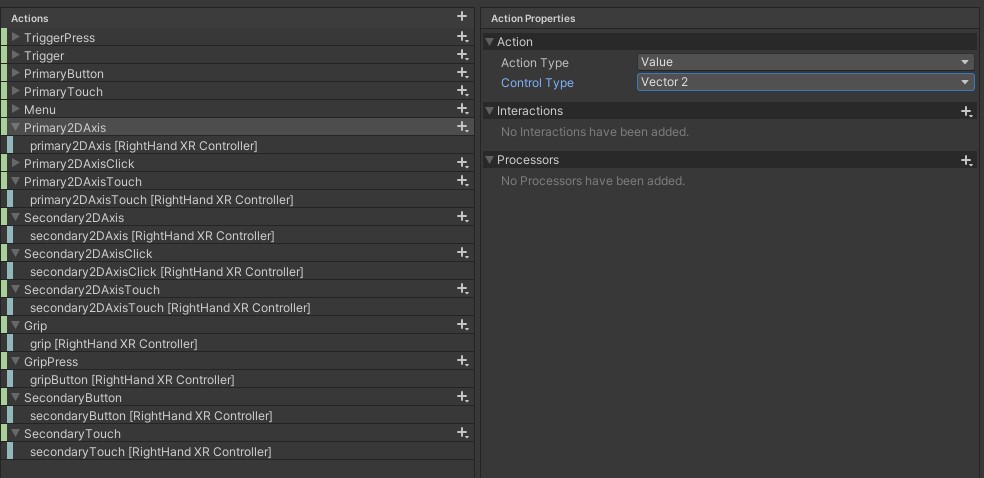
Different Type of Value Returned by the Reference
Different types of actions return different value. For instance, the action we bind the thumbstick with is Vector2.
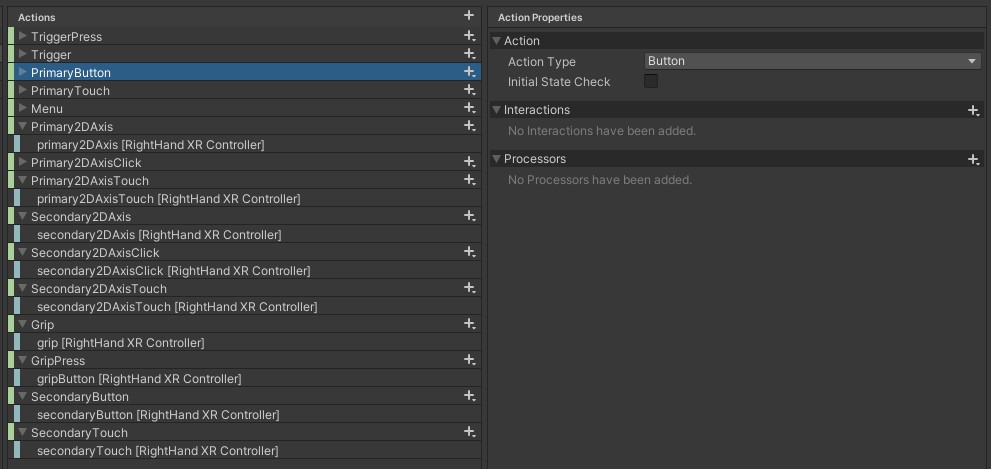
On the other hand, the action type we bind the buttons to is Button, which returns float. On our controller, buttons only return either 0 or 1.
Finally, input such as trigger and grip are bound to Axis, which also return float.
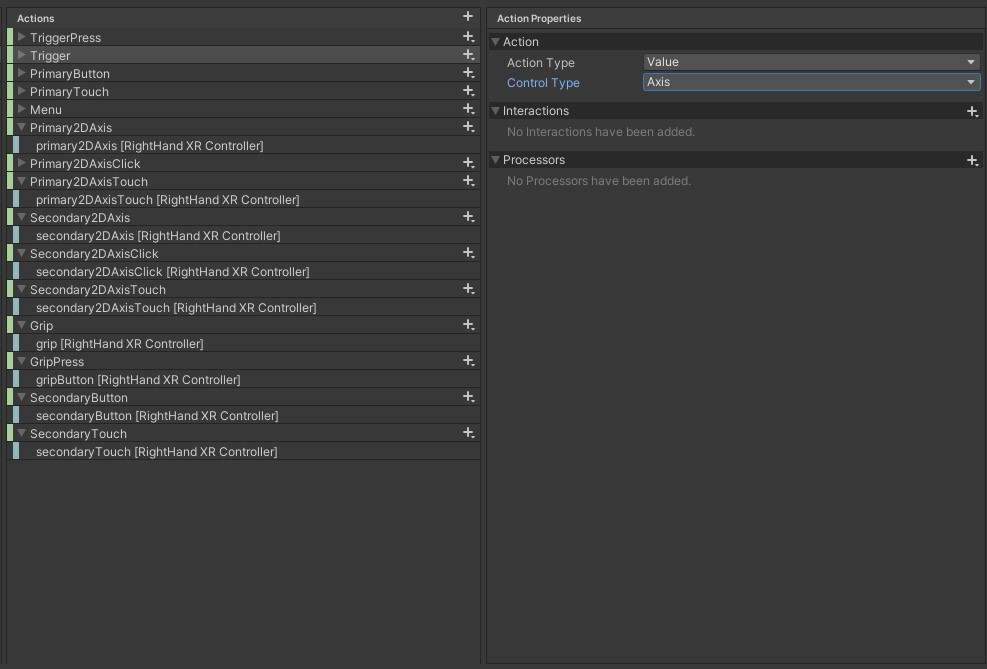
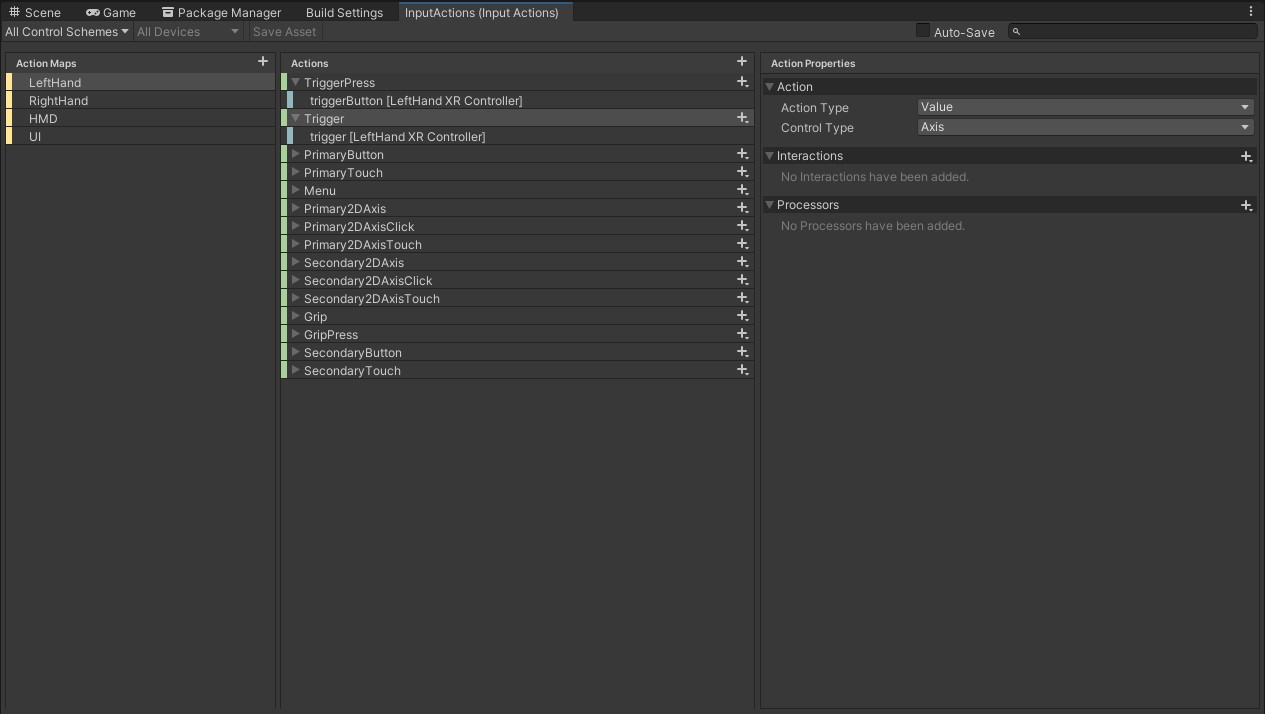
The following are the name of inputs of the controllers and their respective data types.
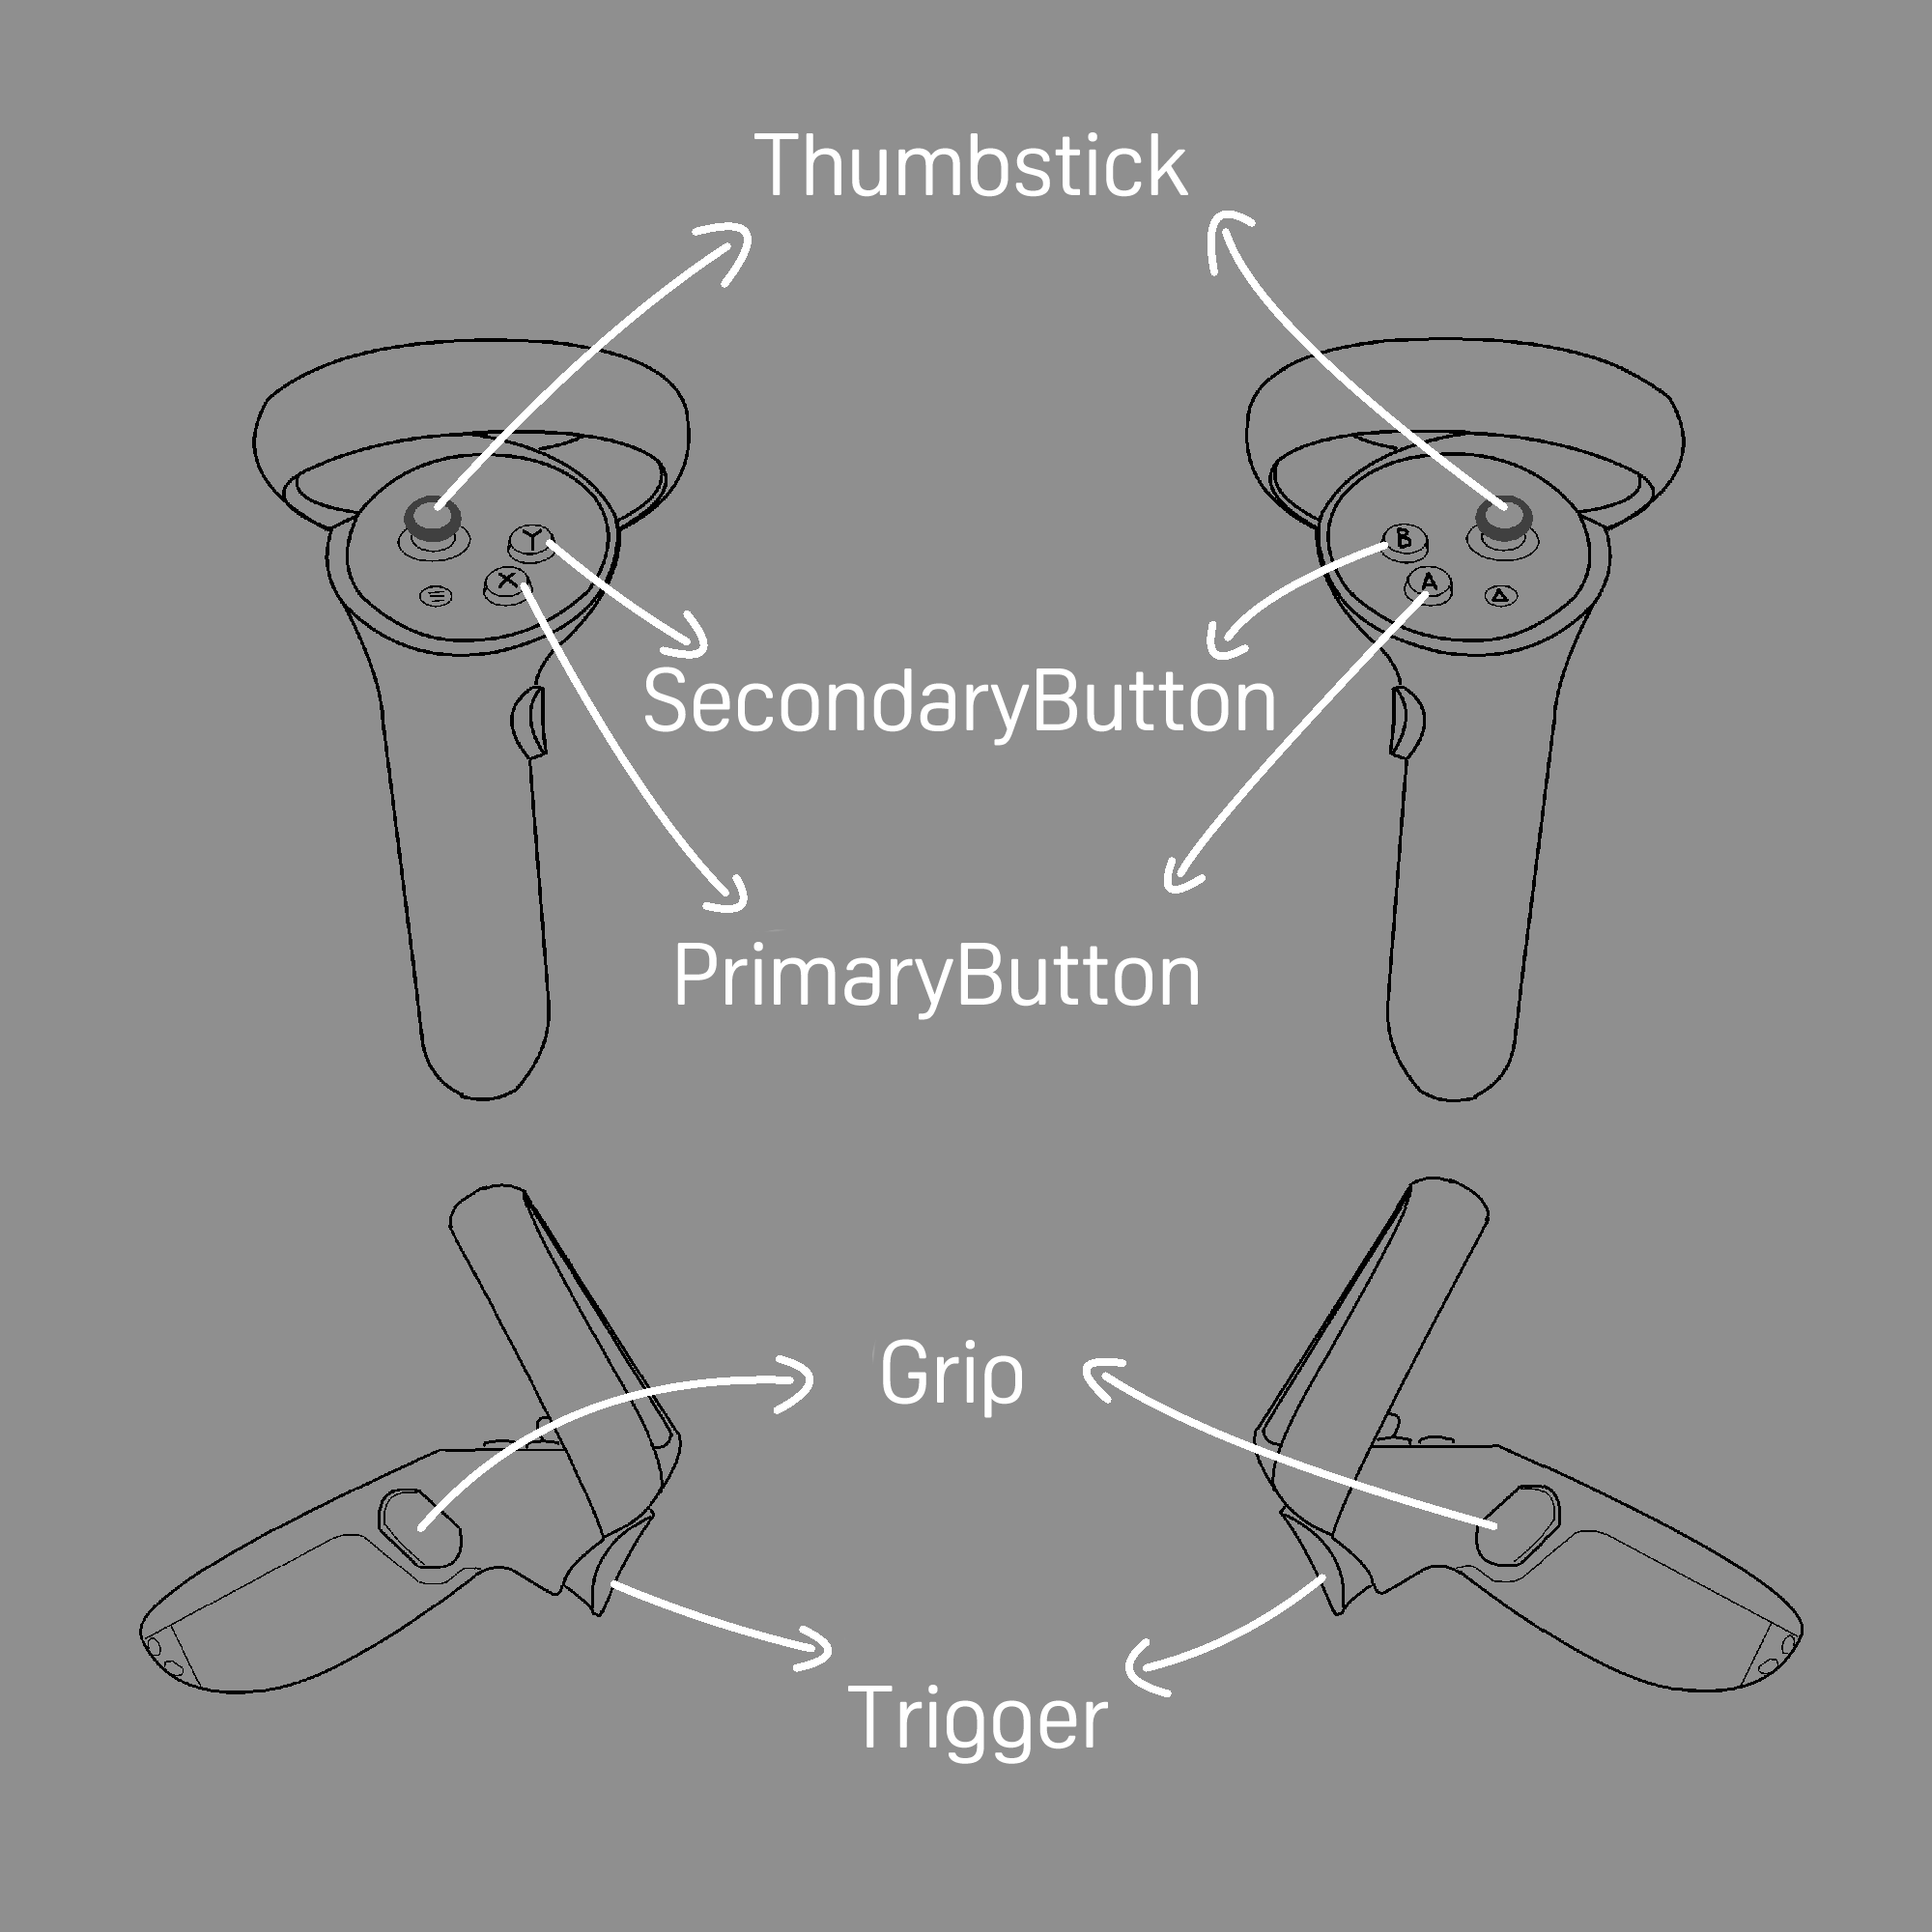
(The name of input of the controller)
(Notice that we provide input of touching and clicking for grip, thumbstick and trigger)
Aim Pose and Grip Pose
Through Input System, the developer can not only use the typical input values, such as bool, float and axis. Instead, they can also get special input values, such as position and rotation from the device. For example, the following actions return the position and rotation of the headset, which is useful.

However, when it comes to the controllers, there are actually two pair of position and rotation for each controller. They are called the Aim pose and the Grip pose. Each of them is designed to be used in different situations.
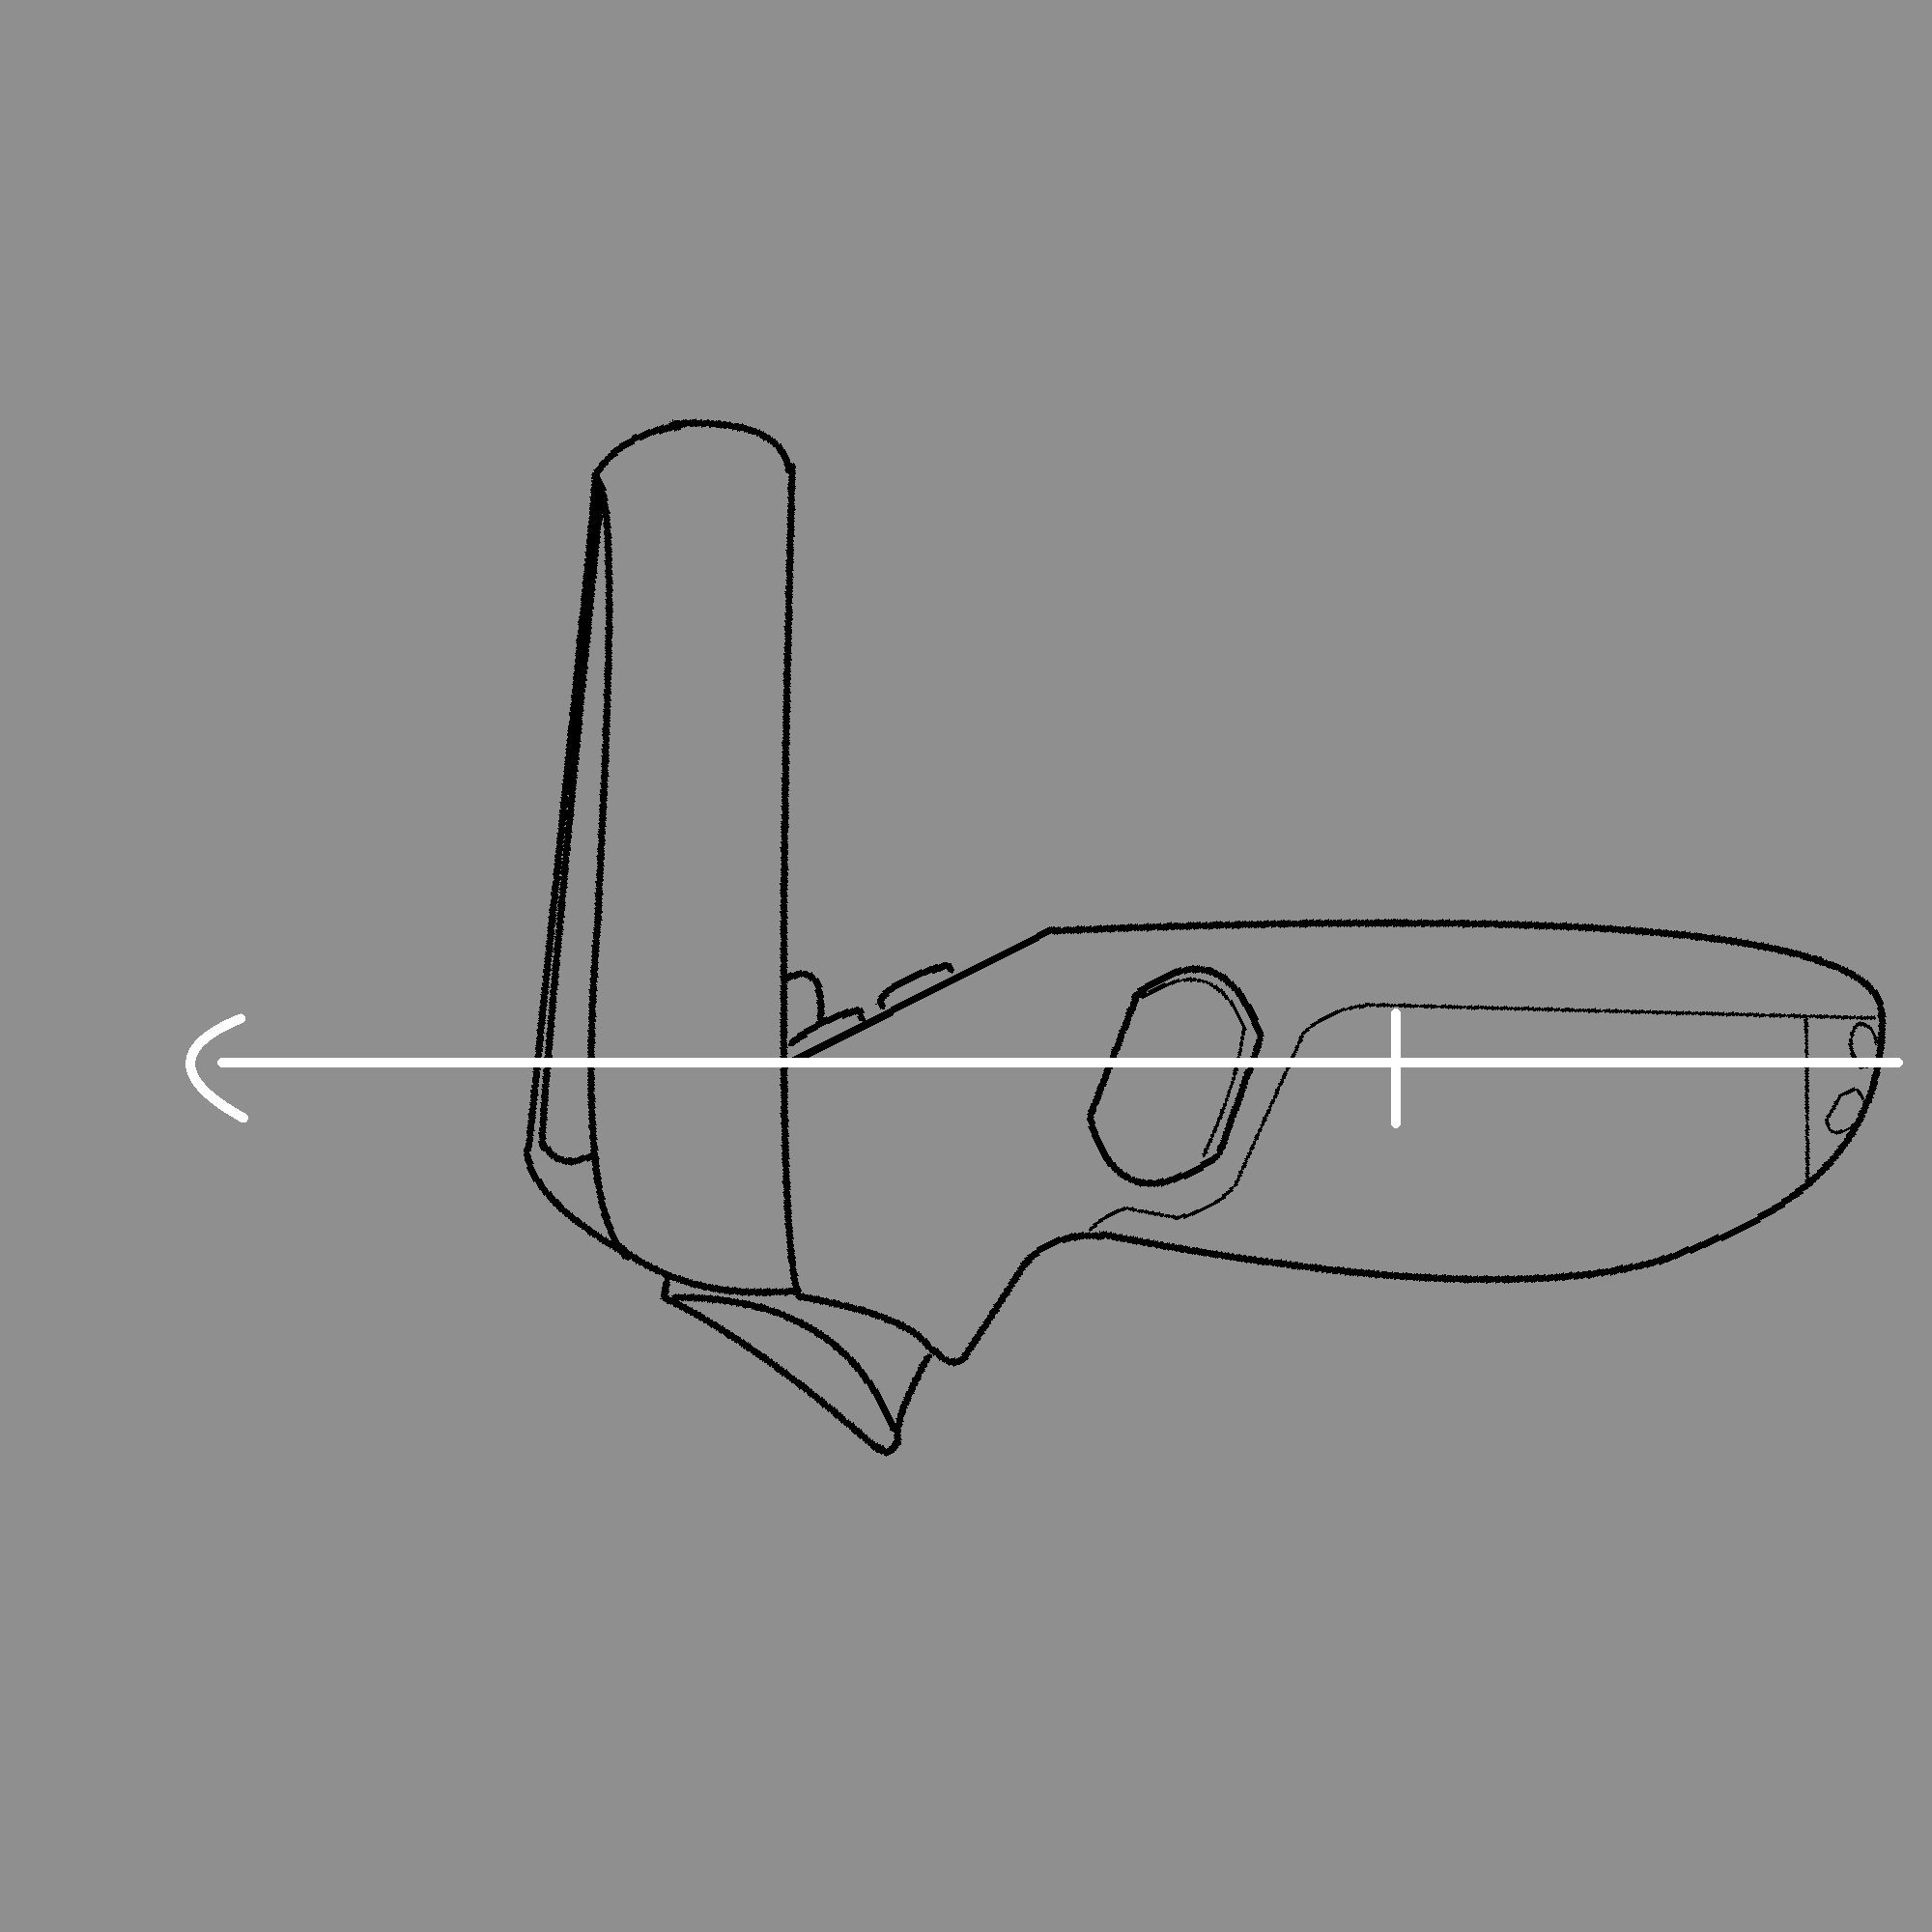
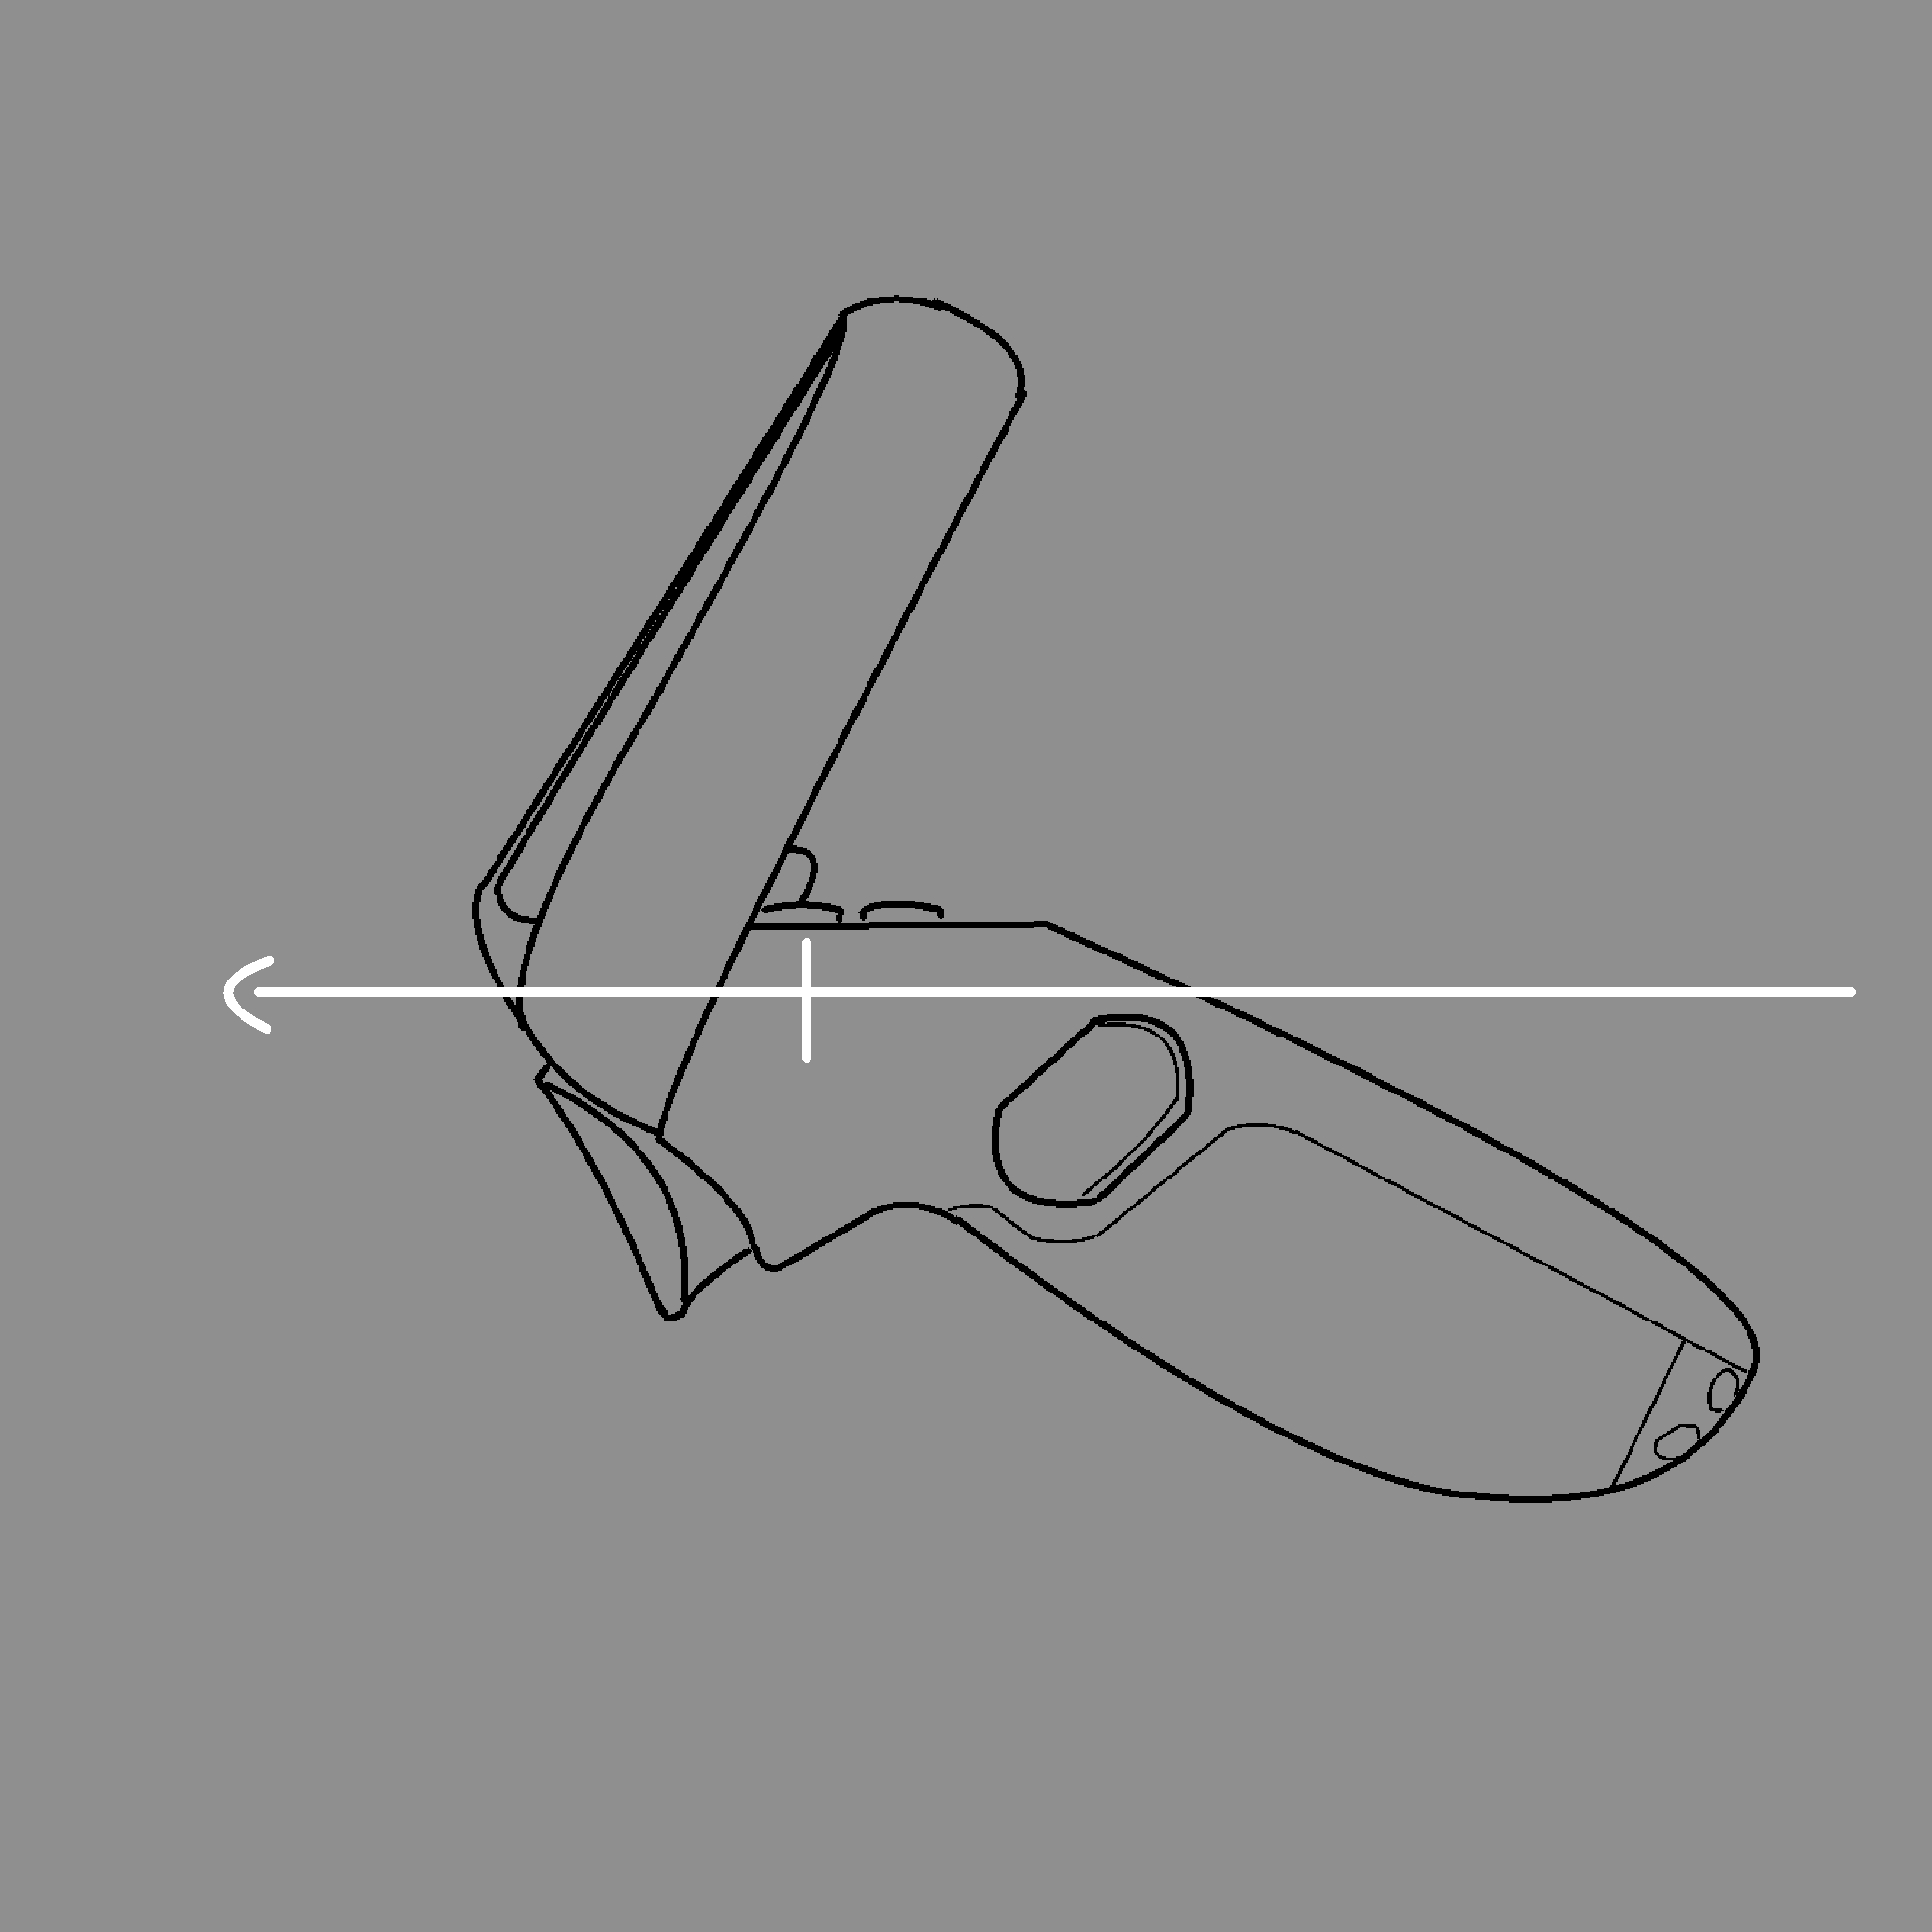
Aim Pose
Aim pose is useful when the developer wants the player to use the controller as a gun.
The origin and facing direction of Aim pose is follows.
public GameObject Bullet_Prefab;
public InputActionReference TriggerR;
public InputActionReference AimDirR;
bool TriggerPressed;
bool TriggerPressing;

void Update(){
    TriggerPressed = (TriggerR.action.ReadValue<float>() > 0.5f) && !TriggerPressing ? true : false;
    TriggerPressing = (TriggerR.action.ReadValue<float>() > 0.5f) ? true : false ;

    if(TriggerPressed){
        Shoot();
    }
}

void Shoot(){
    GameObject _Temp = Instantiate(Bullet_Prefab, transform.position, Bullet_Prefab.transform.rotation);
    _Temp.GetComponent<Bullet>().Movement = AimDirR.action.ReadValue<Quaternion>() * Vector3.forward;
}
(As shown, the rotation of Aim pose is useful for making gameplays such as shooting a bullet)
Grip Pose
On the other hand, Grip pose is useful when you want to place a model, such as a sword or a stick, in the player's hand.
The origin and facing direction of Grip pose is as shown in the following.