Passthrough
Overview
Install the feature
Create a Planar Passthrough
Create a Projected Passthrough
Open a Window to the reality in VR
Creating a MR World using Planar Passthrough
Overview
In this session, lets learn how to use the passthrough feature which enables an application to show the passthrough image to see the surrounding environment from the VR headset. The application is allowed to configure the passthrough image with the different appearances according to the demand of the application.
Install the feature
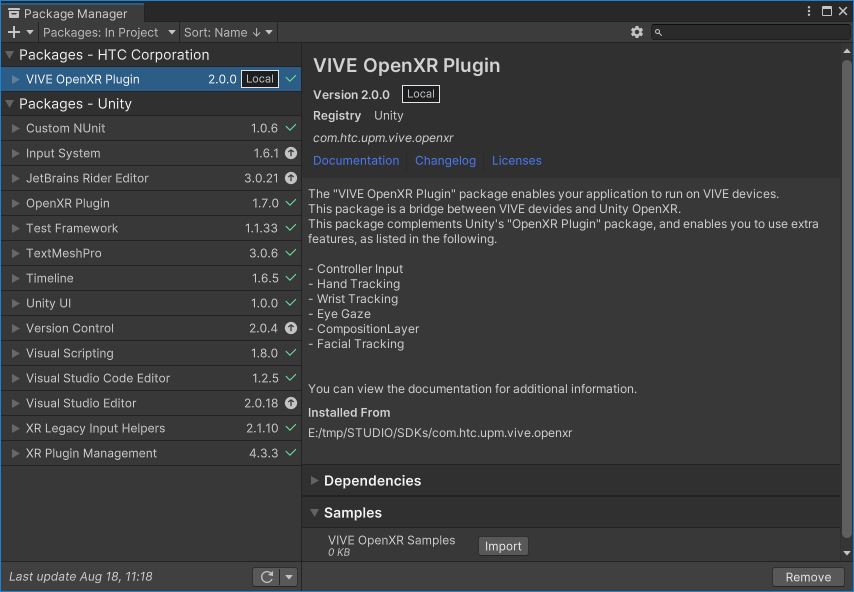
Step 1. Check the version of the packages
Go to Window -> Package Manager and check the version of the packages. Your VIVE OpenXR Plugin should be version 2.0.0 or newer.
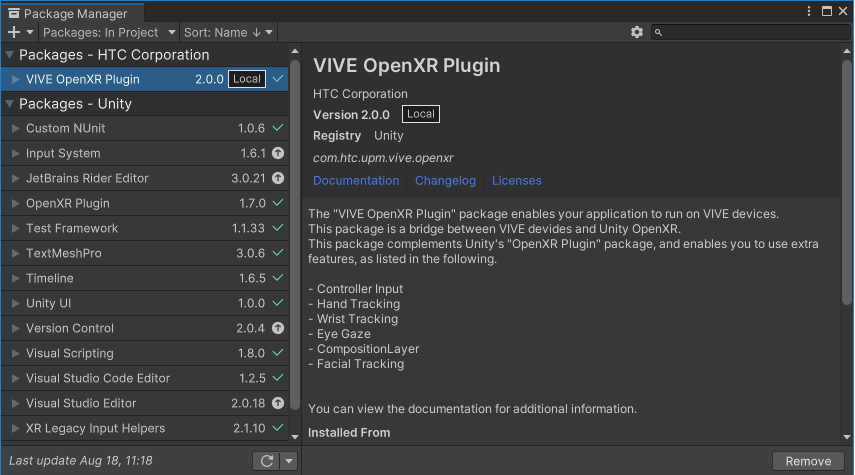
Your OpenXR Plugin should be version 1.4.2 or newer.

Step 2. Enable the Passthrough feature
Next, Go to Edit -> ProjectSettings -> XR Plug-In Management -> OpenXR, and enable VIVE XR Composition Layer and VIVE XR Composition Layer (Passthrough).
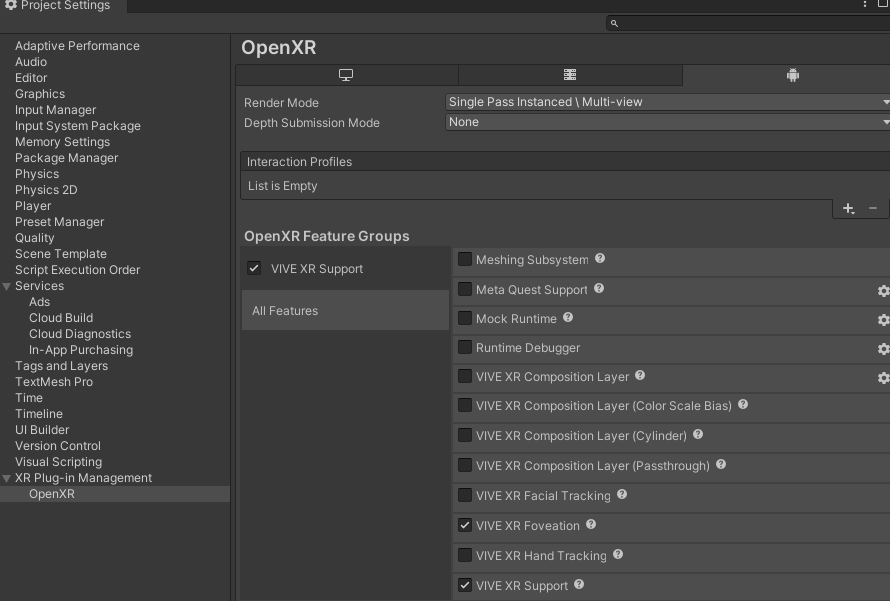
Okay, now we are ready to use the feature. Currently, VIVE XR Composition Layer (Passthrough) allows you to create two kinds of passthrough, planar passthrough and projected passthrough. Lets see how to use them next.
Create a Planar Passthrough
A Planar passthrough is the most common type of passthrough used in XR devices. It is the type of passthrough which covers the full field of view of the player. It is often used when we want the player to see their surroundings, e.g. when the player is out of their designated play area or we are creating MR content.
To create a planar passthrough, we can use the APIs provides by VIVE XR Composition Layer (Passthrough).
Step 1. Create a .cs script
Create a .cs script and attach it to any GameObject in the scene.
Step 2. Add the necessary namespaces
In the script, add these two namespaces.
using VIVE.OpenXR.CompositionLayer.Passthrough;
using VIVE.OpenXR.CompositionLayer;
Step 3. Tell the feature to create a planar passthrough
In Start(), create a planar passthrough with the CreatePlanarPassthrough() API.
int ID;
void Start()
{
    ID = CompositionLayerPassthroughAPI.CreatePlanarPassthrough(LayerType.Underlay);
}
As the ID of the passthrough is required for modifying or controlling the passthrough, remember to store the ID returned by the function. Notice that the function asks for the layertype. The layertype can be either overlay or underlay.
Note: For a better understanding on the overlay and underlay, see Understanding overlay and underlay
Since the planar passthrough covers the whole field of view, if it is set as overlay, the player won't be able to see anything from the content.
On the other hand, if the planar passthrough is an underlay, it means the player can only see the passthrough when you “poke a hole” on the content layer. This is a typical use case for building MR experiences. We will have a further discussion about it in [Article of MR].
Step 4. Destroy the planar passthrough
Since the planar passthrough is not part of MonoBehaviour, it won’t be destroyed by Unity like other MonoBehaviour components like GameObjects. Therefore, remember to destroy the passthrough manually with the ID you got when creating the passthrough.
The following code destroys the passthrough after 10 seconds since the app is launched.
void Update()
    {
        if(Time.realtimeSinceStartup > 10)
        {
            CompositionLayerPassthroughAPI.DestroyPassthrough(ID);
        }
    }
Create a Projected Passthrough
While a planar passthrough covers the whole field of view, a projected passthrough only takes up a specific part of the view. This kind of passthrough is useful when you only want the player to see a fragment of the real world and still see most of the virtual environment. For example, you can use this kind of passthrough to let the player see the keyboard when they are typing in your application.
The projected passthrough can also be created by using APIs provided by VIVE XR Composition Layer (Passthrough).
Step 1. Create a .cs script
Create a .cs script and attach it to any GameObject in the scene.
Step 2. Add using namespaces
In the script, add these two namespaces:
using VIVE.OpenXR.CompositionLayer.Passthrough;
using VIVE.OpenXR.CompositionLayer;
Step 3. Declare a Mesh
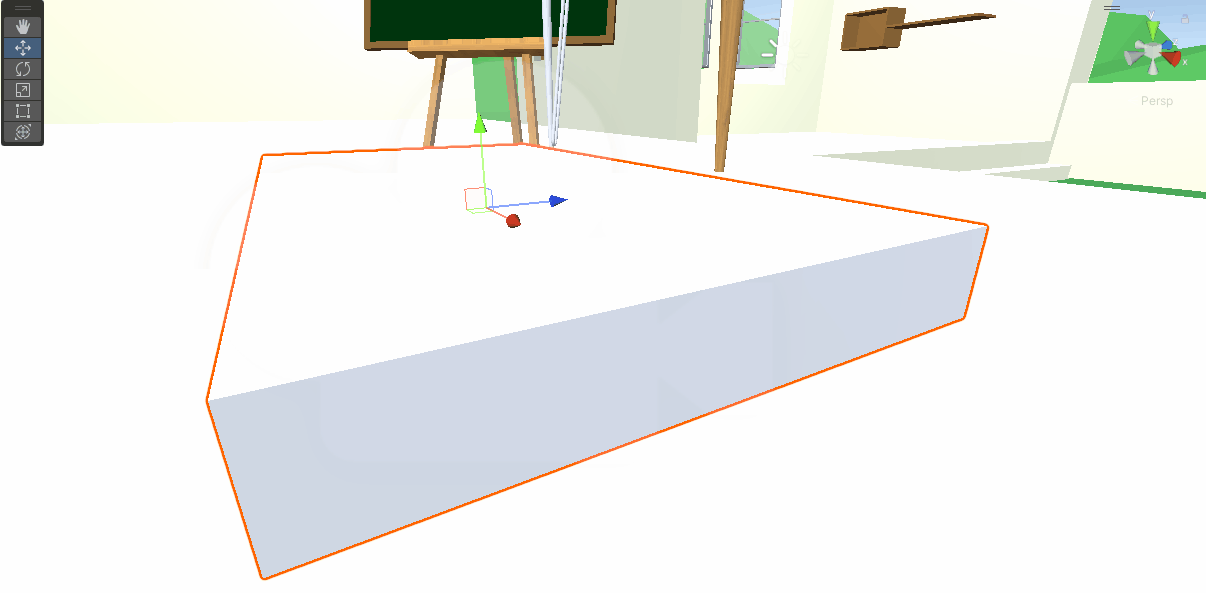
Declare a Mesh, e.g. UsingMesh. This Mesh will be passed to the feature, where the shape of the projected passthrough will be that of the Mesh.
[SerializeField] Mesh UsingMesh;
Step 4. Declare an int, ID
Declare an int, ID. This ID serves the same purpose as the one mentioned in the planar passthrough section, which is a reference to the projected passthrough.
int ID;
Step 5. Create the passthrough
Use the CreateProjectedPassthrough() function to create a projected passthrough.
ID = CompositionLayerPassthroughAPI.CreateProjectedPassthrough(LayerType.Overlay);
Notice that the CreateProjectedPassthrough() function also requires a LayerType parameter input. If the LayerType is set to underlay, it means the passthrough can not be seen if you don’t “poke a hole” on the content layer. To see how to poke a hole on the content layer, go here[Link to partial reality], and if you are not familiar with LayerType, see [Lint to UnderstandingOverlayandUnderlay].
Step 6. Set the shape and transform of the passthrough
Use the SetProjectedPassthroughMesh() function to set the mesh (shape) of the passthrough.
int[] indices = new int[UsingMesh.triangles.Length];
        for (int i = 0; i < UsingMesh.triangles.Length; i++)
        {
            indices[i] = UsingMesh.triangles[i];
        }
        CompositionLayerPassthroughAPI.SetProjectedPassthroughMesh(ID, UsingMesh.vertices, indices, true);
        CompositionLayerPassthroughAPI.SetProjectedPassthroughMeshTranform(ID, ProjectedPassthroughSpaceType.Worldlock, Vector3.forward * 2 + Vector3.up, Quaternion.identity, Vector3.one);
and use the SetProjectedPassthroughMeshTranform() function to set the transform (position, rotation, and scale) of the passthrough.
CompositionLayerPassthroughAPI.SetProjectedPassthroughMeshTranform(ID, ProjectedPassthroughSpaceType.Worldlock, Vector3.forward * 2 + Vector3.up, Quaternion.identity, Vector3.one);
Step 7. Assign a mesh to the UsingMesh variable
In the inspector, assign the default cube mesh to UsingMesh.
Now if you run the app, you should see a passthrough with the shape of a cube in front of you.
For further details of the APIs provided by the Passthrough feature, see Here.
Open a Window to the reality in VR
When you are making VR games, have you ever thought how great it would be if you could let the player see a certain item or view of the outside world in the content? For example, maybe you want the player to see the keyboard when they are typing in-game.
In this article, I am going to show you how to open a window to the player’s surroundings in your game.
Note: If you're not familiar with the Passthrough feature, please go check Passthrough
Step 1. In your game, add a GameObject with a mesh
Add a GameObject with a mesh to your scene. The mesh will be the window to the outside world.
Step 2. Create the passthrough
Create a script name CreateProjectedPassthrough.
In the script, add the following namespaces:
using VIVE.OpenXR.CompositionLayer.Passthrough;
using VIVE.OpenXR.CompositionLayer;
Declare variables.
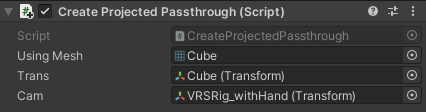
[SerializeField] Mesh UsingMesh;
[SerializeField] Transform Trans;
[SerializeField] Transform Cam;
int ID;
UsingMesh is the mesh for specifying the shape of the projected passthrough we want to create. Trans is the transform of the projected passthrough. Cam is the transform of the camera. ID is a reference to the generated passthrough.
First, we create an underlay projectedpassthrough using
In Start, we first create a underlay projectedpassthrough using CreateProjectedPassthrough.
Note: If you don't know what is a underlay passthrough, please see UnderstandingOverlayandUnderlay.
Then, get the indices from UsingMesh, and set them to the passthrough using SetProjectedPassthroughMesh. Finally, set the transform of the passthrough according to Trans and Cam. Note that if your camera is not in the origin of the world, you must give the API the inverse transformation according to Cam.
void Start()
{
    ID = CompositionLayerPassthroughAPI.CreateProjectedPassthrough(LayerType.Underlay);
    int[] indices = new int[UsingMesh.triangles.Length];
    for (int i = 0; i < UsingMesh.triangles.Length; i++)
    {
        indices[i] = UsingMesh.triangles[i];
    }

    CompositionLayerPassthroughAPI.SetProjectedPassthroughMesh(ID, UsingMesh.vertices, UsingMesh.triangles[i]);
    CompositionLayerPassthroughAPI.SetProjectedPassthroughMeshTransform(ID, ProjectedPassthroughSpaceType.Worldlock, Cam.InverseTransformPoint(Trans.position),Quaternion.Inverse(Cam.transform.rotation) * Trans.rotation, Trans.lossyScale);
}
Note: If you wish to move the passthrough dynamically, remember to set the transformation in Update
void Update()
{
    CompositionLayerPassthroughAPI.SetProjectedPassthroughMeshTransform(ID, ProjectedPassthroughSpaceType.Worldlock, Cam.InverseTransformPoint(Trans.position), Quaternion.Inverse(Cam.transform.rotation) * Trans.rotation, Trans.lossyScale);
}
Step 3. Assign the information to the script
Remember to assign the information the script requires in the inspector. Trans should be assigned to the GameObject we dragged into the scene. UsingMesh should have the mesh used by the GameObject. Cam should be the transform of the the root of the camera rig in world space.
Step 4. Create a Material
As I mentioned in [UnderstandingOverlayandUnderlay], an underlay passthrough can not be seen unless there is a hole in the content layer. So, in order to create a hole, we are going to create a material from a special shader.
First, create a new unlit shader.

In the fragment part of the shader, return a color of all 0.
fixed4 frag (v2f i) : SV_Target
{
    fixed4 col;
    col.r = 0;
    col.g = 0;
    col.b = 0;
    col.a = 0;
    return col;
}
Finally, create a material using the shader.
Step 5. Give the material to the GameObject
Now when you run the game, you will be able to see the real world through the GameObject.
Creating a MR World using Planar Passthrough
Hi there, in this session, I would like to talk about how to build a MR World. As a developer, I believe we are all driven into the world of VR when we see how fascinating and vivid the game has become because of virtual reality. However, I think we are all a little frustrated when we come to realize that no matter how limitless our imaginations are in the world of VR, we are still physically bound by the real world. For example, we cannot run, jump, or carry out other actions freely without the fear of accidentally knocking over a glass cup. And what is more dreadful is the fact that we cannot create a world that fits the play areas that different players are in. However, as a developer, we surely won’t let anything stop us from unleashing our imagination, right? Therefore, I am here to offer a solution.
So, if we cannot create our level freely without ignoring the real world objects surrounding the player, then why not just include them in our design? In this article, I want to show you how to create a small game based on the player’s real surroundings using the planar passthrough. The game I am going to create today is a classic Whac-A-Mole game. Now, let us set sail!
Note: If you're not familiar with the Passthrough feature, please go check Passthrough
Step 1. Import the VIVE OpenXR Samples package
In this article, we are going to use some assets provided by VIVE OpenXR Samples, so please install the package and make sure it's version is 1.0.4 or newer.
Step 2. Create an empty scene and remove the main camera
Step 3. Adding a Rig
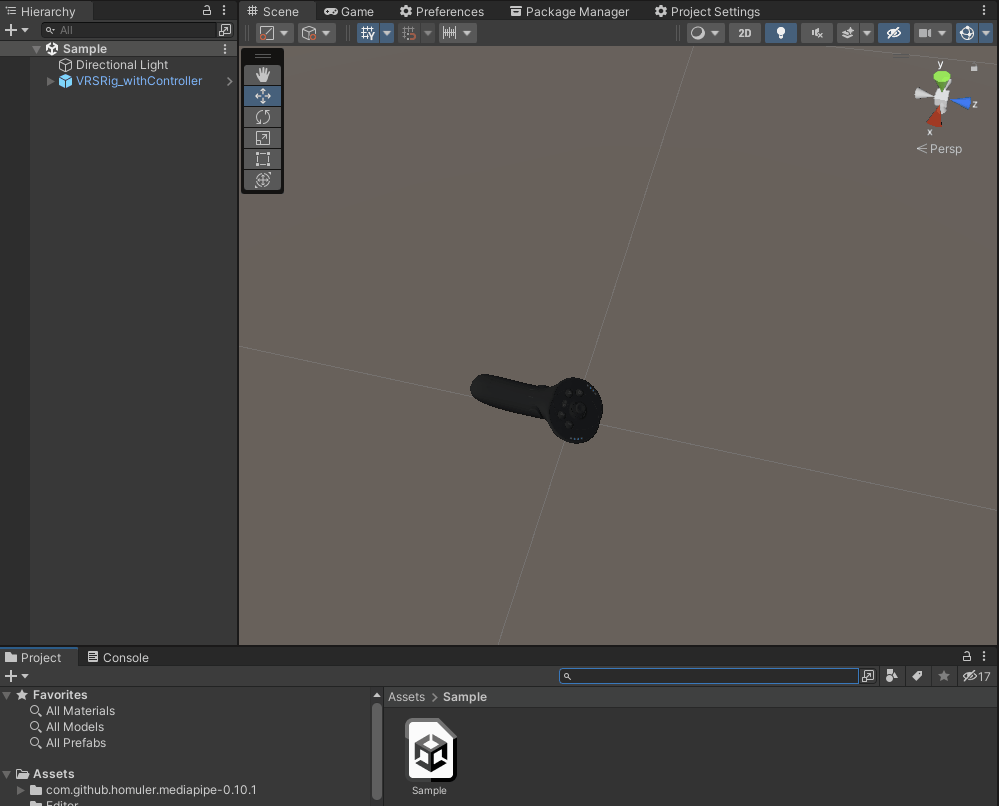
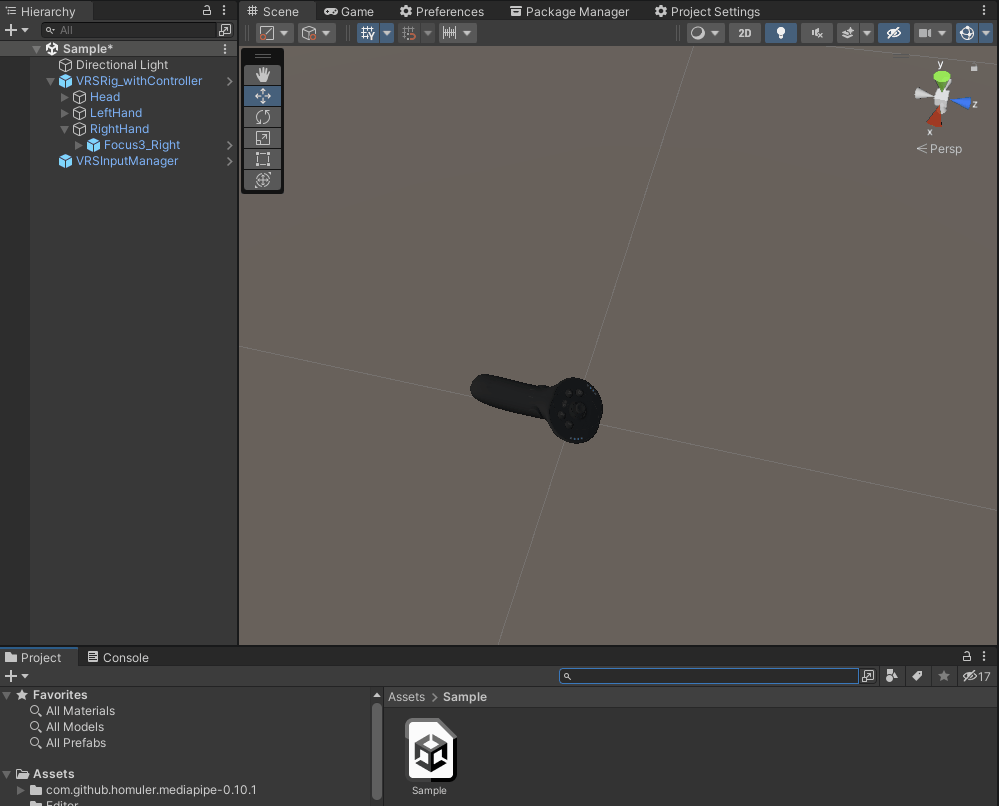
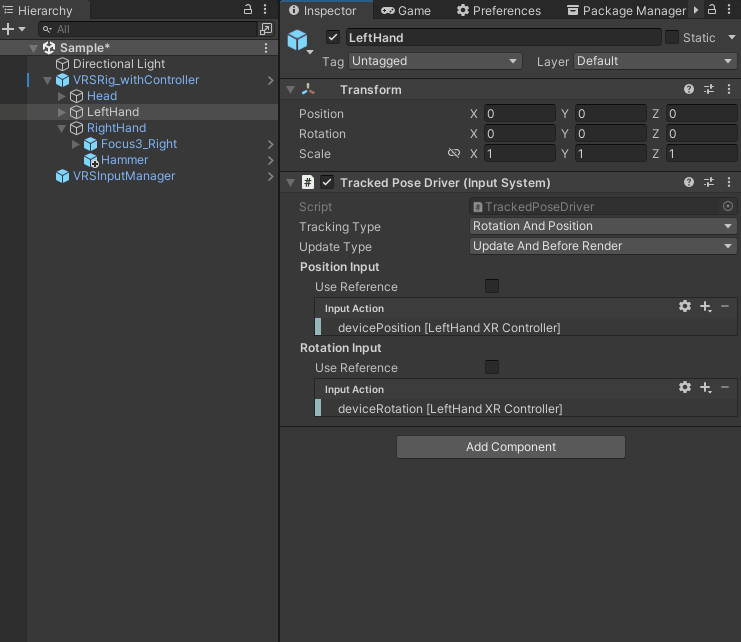
In the Project window, search for VRSRig_withController and drag it into the scene.
Step 4. Add a VRSInputManager
Again, in the Project window, search for VRSInputManager. The VRSInputManager is a tool provided by VIVE OpenXR Samples. This tool configures the basic input, such as buttons, position, and rotation, of Input System for us, so we can use simple APIs to get the inputs we need.
Step 5. Add a Hammer under the right hand
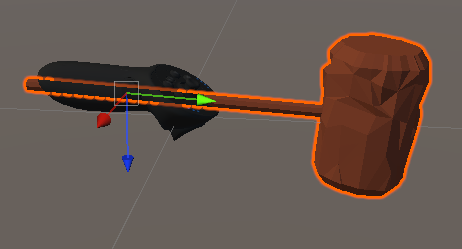
Search for Hammer and add it under the right hand.
Step 6. Adjust the transform of Hammer
Align the transform of Hammer with the controller
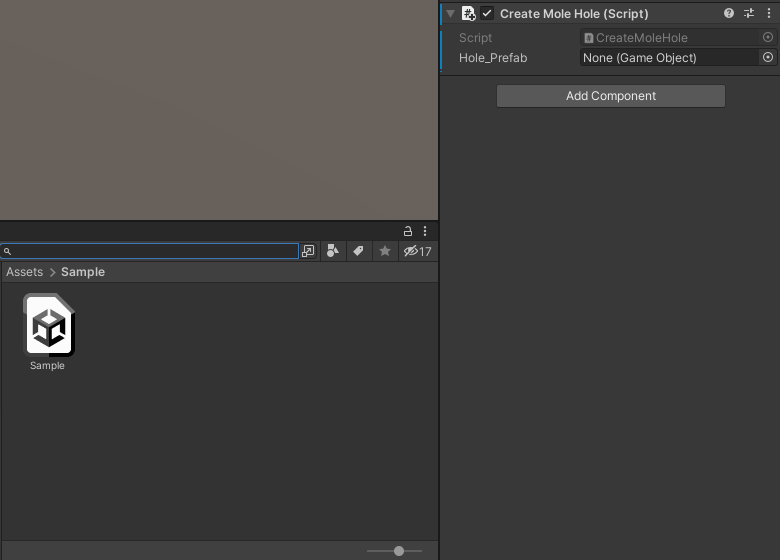
Step 7. Create a Script CreateMoleHole
Step 8. In CreateMoleHole
First, add using namespace VIVE.OpenXR.Samples
using VIVE.OpenXR.Samples;
Declare a GameObject Hole_Prefab. The prefab object reference will be assigned to Hole_Prefab from the inspector later.
[SerializeField]GameObject Hole_Prefab;
In Update, spawn a MoleHole when the player clicks the left trigger.
void Update()
{
    if(VRSInputManager.instance.GetButtonDown(VRSButtonReference.TriggerL))
    {
        Instantiate(Hole_Prefab, VRSInputManager.instance.GetPosition(VRSPositionReference.AimL), Hole_Prefab.transform.rotation);
    }
}
Step 9. In editor, attach the script to a gameobject and assign the MoleHole
Search for MoleHole and assign it to the script.
Moles will pop up from the hole after a while it was hit by the hammer.
Step 10. Add an planar underlay passthrough
First, create another script named CreatePlanarPassthrough and attach it to any GameObject in the scene.
In the script, add using namespaces.
using VIVE.OpenXR.CompositionLayer.Passthrough;
using VIVE.OpenXR.CompositionLayer;
Then, in Start, create the passthrough
void Start()
{
    CompositionLayerPassthroughAPI.CreatePlanarPassthrough(LayerType.Underlay);
}
Step 11. Cut a big hole for the player to see the passthrough
Because the passthrough we created using in CreatePlanarPassthrough is a underlay passthrough, so if we don't make a hole in the content layer, the player won't be able to see the passthrough.
Note: If you are not familiar with underlay, please check Understanding overlay and underlay
To make a big hole, in the inspector of camera, set the clear flag to Solid Color and change the RGBA of color to 0.

Finally, we can run and try out the game!
See Video for the passthrough demo and enjoy your MR world!