English
VIVEPORT Beta Testing Guide
Document version: 3.0, Released December 27th, 2018
Changelog:
Beta Testing: Test your titles before unveiling to consumers!
The beta testing feature provides a way to test your titles before public release and submission to the VIVEPORT review team. You can check the title’s performance, integration, and app listing. VIVEPORT also provides the function to invite users to join the beta testing.
Before You Start:
Make sure you have registered a VIVEPORT developer account for accessing the developer console: https://developer.viveport.com/console/ .
You also need to install the VIVEPORT Software to run beta testing for PC titles: https://www.vive.com/setup/ .
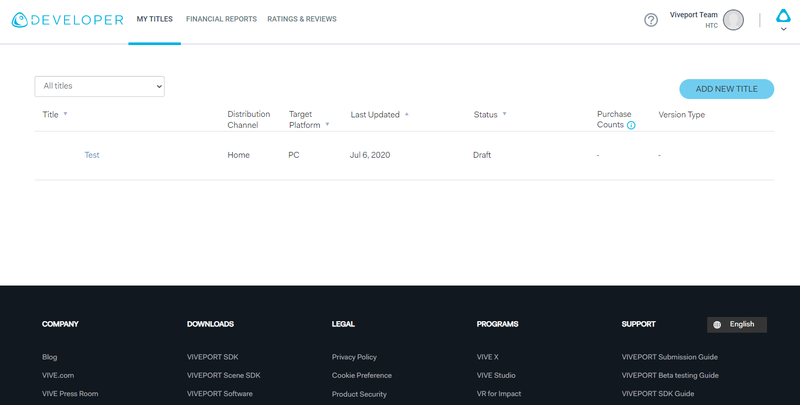
Create a Beta Release
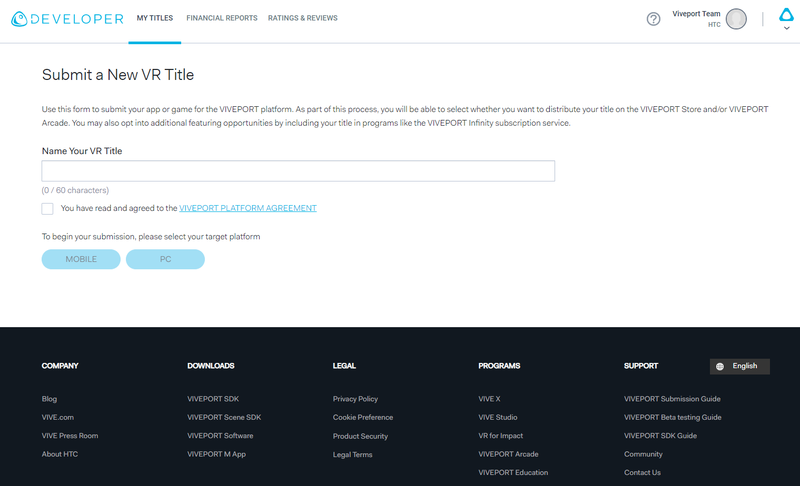
Step 1: Use “Add new title” button to create a new title
Select the target platform and name your new title. Please note: the beta testing feature for
mobile titles only supports WAVE runtime.
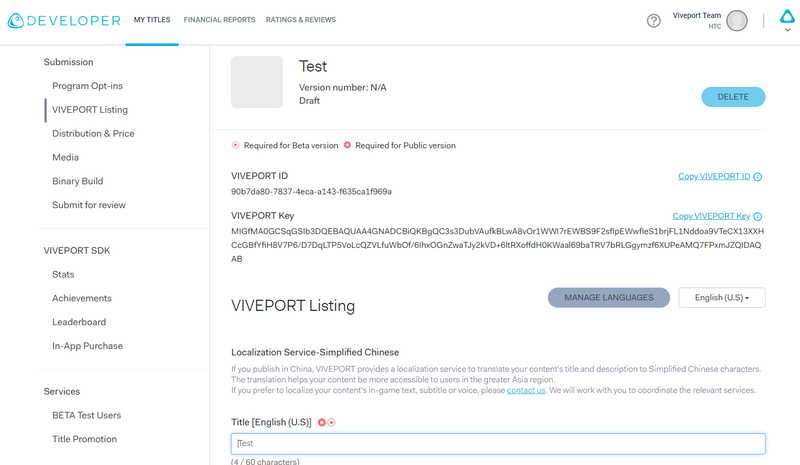
Step 2: Complete submission information
Before submitting your beta title, there is required information that needs to be provided. The required fields are marked with the symbols “
![]() ” or “
” or “
![]() ” or “
” or “
![]()
![]() ”. The image of
”. The image of
![]() means it is a required field for beta testing. On the other hand,
means it is a required field for beta testing. On the other hand,
![]() means it is required for production release.
means it is required for production release.
Tip: For PC titles, make sure your .exe binary path is correct; you may refer to the VIVEPORT Submission Guide under “Binary Build Section”: https://developer.vive.com/resources/viveport/store-guide/store-submission-guide/english/submitting-your-viveopenvr-content/binary-build/
For MVR titles, when uploads apk., please note that you need to use the same certification for both production & beta releases and set version code of beta build bigger than the production build.
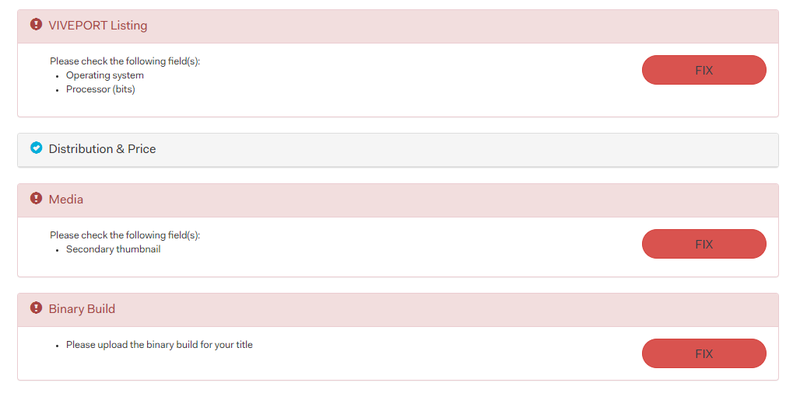
Tip: To quickly find what required fields are missing for beta testing, go to the “Submit” tab. Choose ”Create a beta version”. You will see a checklist for submission readiness. Click “Fix” to jump to the relevant tab and fill in the required fields.
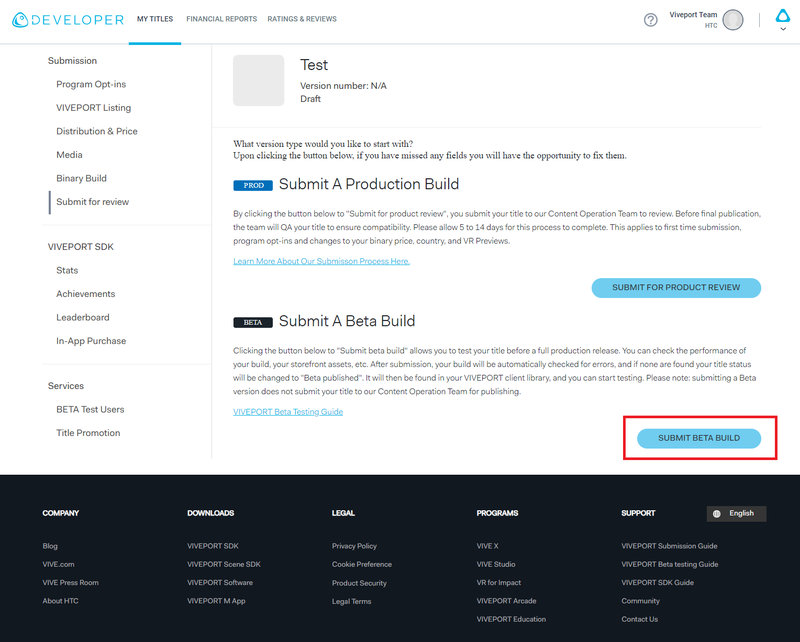
Step 3: Create beta version from “Submit” tab
After filling in all the required fields, click the “Create a beta version” button in the Submit tab. The VIVEPORT service will start to process the beta title.
Understand Beta Version Statuses
After creating your beta title, there are three statuses you might need to know about.
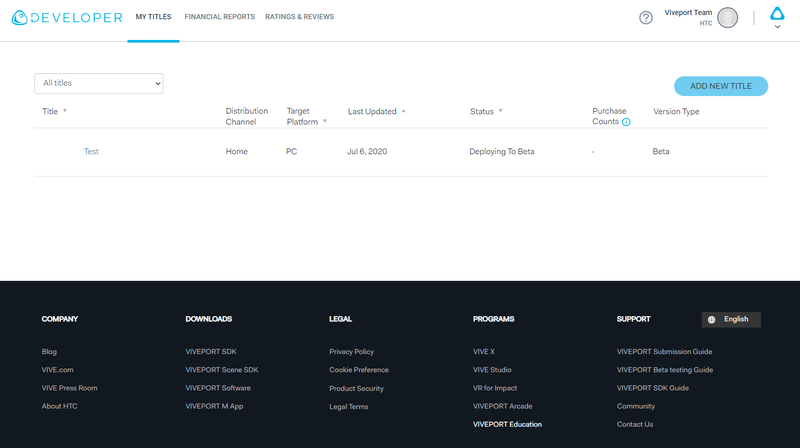
Deploying To Beta
- Title is under deployment to beta environment: it may take up to 5 minutes before you can download your beta title from VIVEPORT Software/Application (based on the size of your file).
- VIVEPORT service failed during deployment: deployment is unsuccessful. Click “Edit” to do adjustment and submit again.
Beta Published
This status means the title has successfully deployed to beta environment.
Unpublished
A title under this status is not available for beta testers. If you want to delete your beta title,
please
contact us
to finish the title un-publish flow.
Test Beta PC Title with VIVEPORT Software
After your title has been successfully deployed to the beta environment, install and open VIVEPORT Software ( https://www.vive.com/setup/ ) and sign in with your developer account.
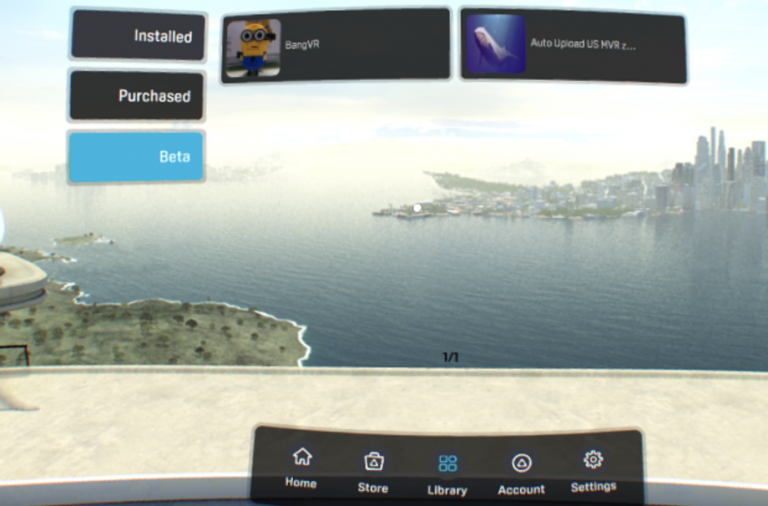
After launching VIVEPORT Software, switch to Library tab, and you will find the beta title there and can start downloading. Beta titles will be marked as below.
Once you have installed the beta title, you can launch the title and test. The title needs to stay published to the beta environment to test.
Test Beta Mobile Titles with VIVEPORT Application
After your title has been successfully deployed to beta environment, go back to your MVR devices and sign in your developer account.
Visit Library and you should be able to see the Beta tab. You can download/open/update available beta titles from there. Beta titles need to stay published to be found at Beta tab.
There is also an entry point for you to browse beta content detail page.
Update Beta Version and Release Beta Version to Production
Update
You can update a published beta title. Go to My Title > Manage and find your beta title, and then click “Edit”; it will create a new draft version of the title. After editing, go to “Submit” and click “Create a beta version”. The previous beta version will be replaced after the new version has deployed successfully.
Release to Production
You can release your published beta title to production. Go to My Title > Manage and find your beta title, and then click “Edit”, and fill in all the required information for a production release, go to “Submit” and click “Create production release”. Production release titles will first undergo a review by the VIVEPORT content team before being published.
Invite Beta Users to Test Beta Version
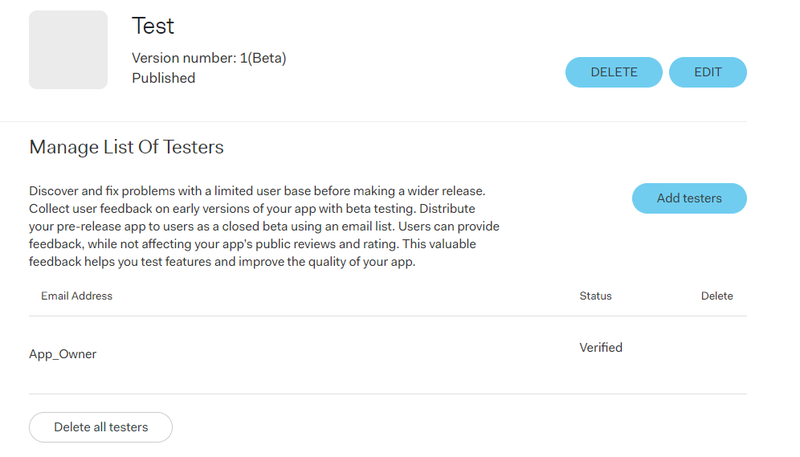
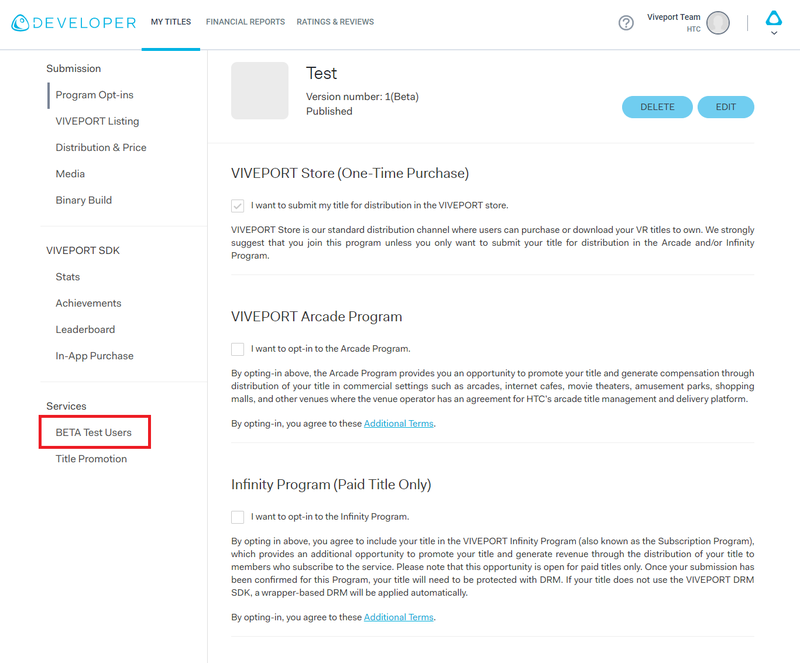
Step 1: Click “Test Users” section on the sidebar to invite users to a Beta Published title
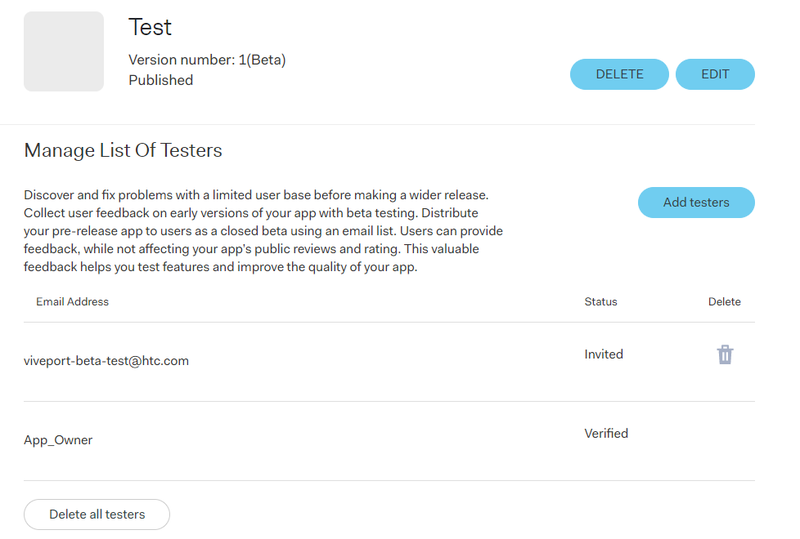
Click the “Test Users”. You can manage and create the testers on this page. “App_Owner” refers to the current developer account that submitted the beta title and cannot be deleted.
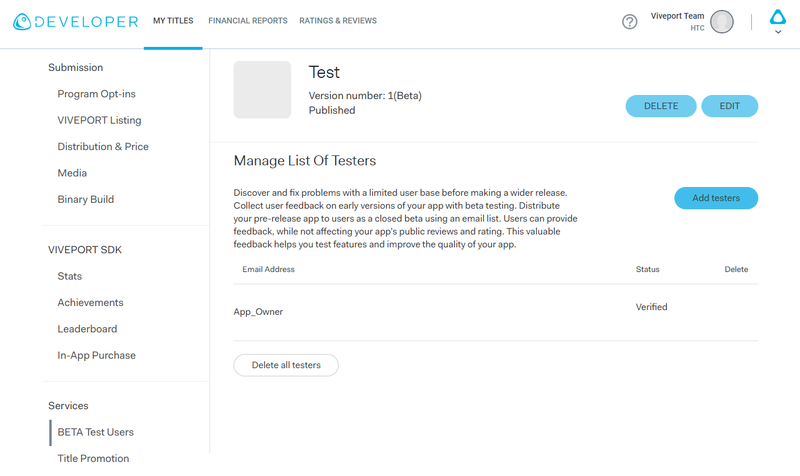
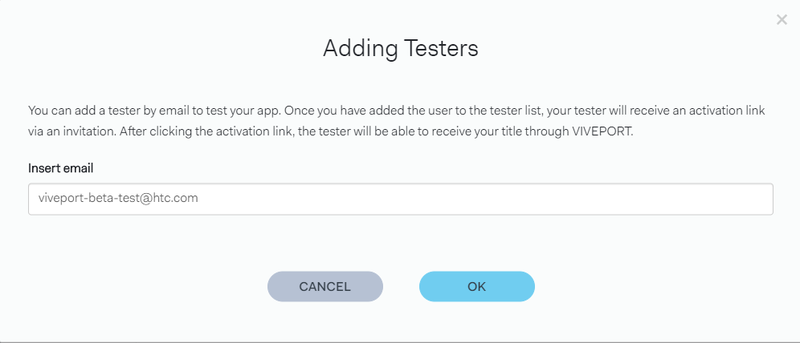
Step 2: Add Beta testers
Click the “Add testers” button. A dialog box will appear where you can add the emails of the users who will participate in the beta test. Press “ENTER” to add an individual email and continue adding emails. When finished, click “Ok” and the emails will be added into the list.
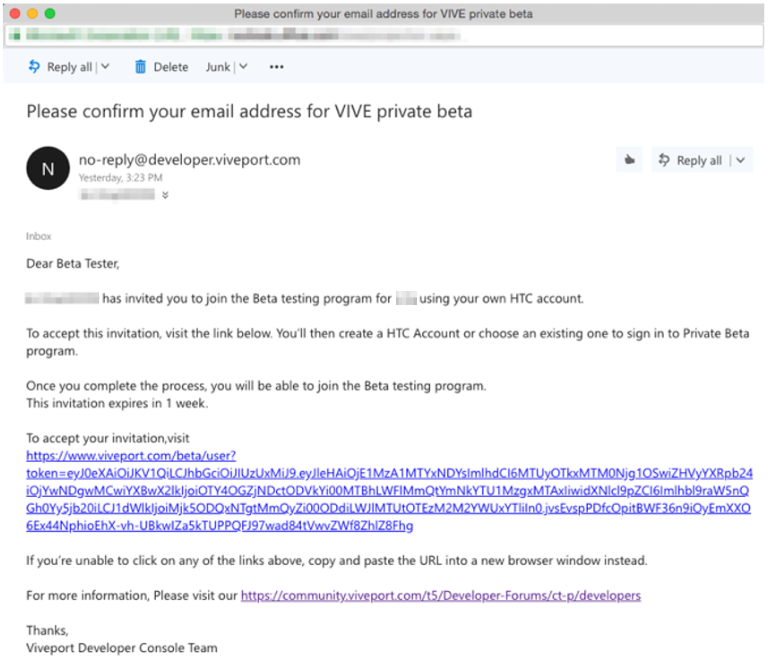
Step 3: Send email to the user
After the beta testers are added, an email invitation will be sent to each with a link to accept and become a beta tester of the title. Beta testers will now be able to view and download the beta title with the VIVEPORT Software/Application installed.
Step 4: Delete an invited user
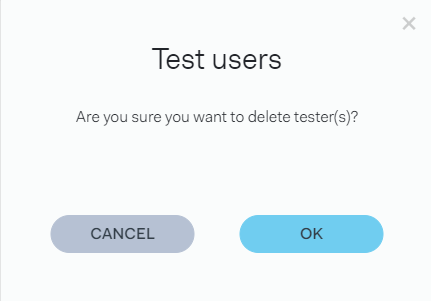
In the detail page “Test Users”, you can individually delete the invited user by clicking the delete button on the right side. You can also delete all invited beta testers by clicking
“Delete all testers”. After the invited user is deleted, VIVEPORT will remove the ownership between the tester and the beta title. A beta user who already downloaded the app won’t be able to launch the game if the title is protected by DRM Wrapper or SDK. If the invited user hasn’t activated the beta title ownership yet, it will be removed from their VIVEPORT Library.