Passthrough
⚠ NOTICE |
|
This legacy plugin is no longer being updated and maintained, please develop mobile content with OpenXR 2-in-1 Unity / Unreal package . |
In this session, lets learn how to use the passthrough feature which enables an application to show the passthrough image to see the surrounding environment from the VR headset. The application is allowed to configure the passthrough image with the different appearances according to the demand of the application.
Install the feature
Step 1. Check the version of the packages
Go to Window -> Package Manager and check the version of the pacakages. Your VIVE Wave OpenXR Plugin & Toolkit for Android should be version 1.0.4 or newer.


Your OpenXR Plugin should be version 1.4.2 or newer.

Step 2. Enable the Passthrough feature
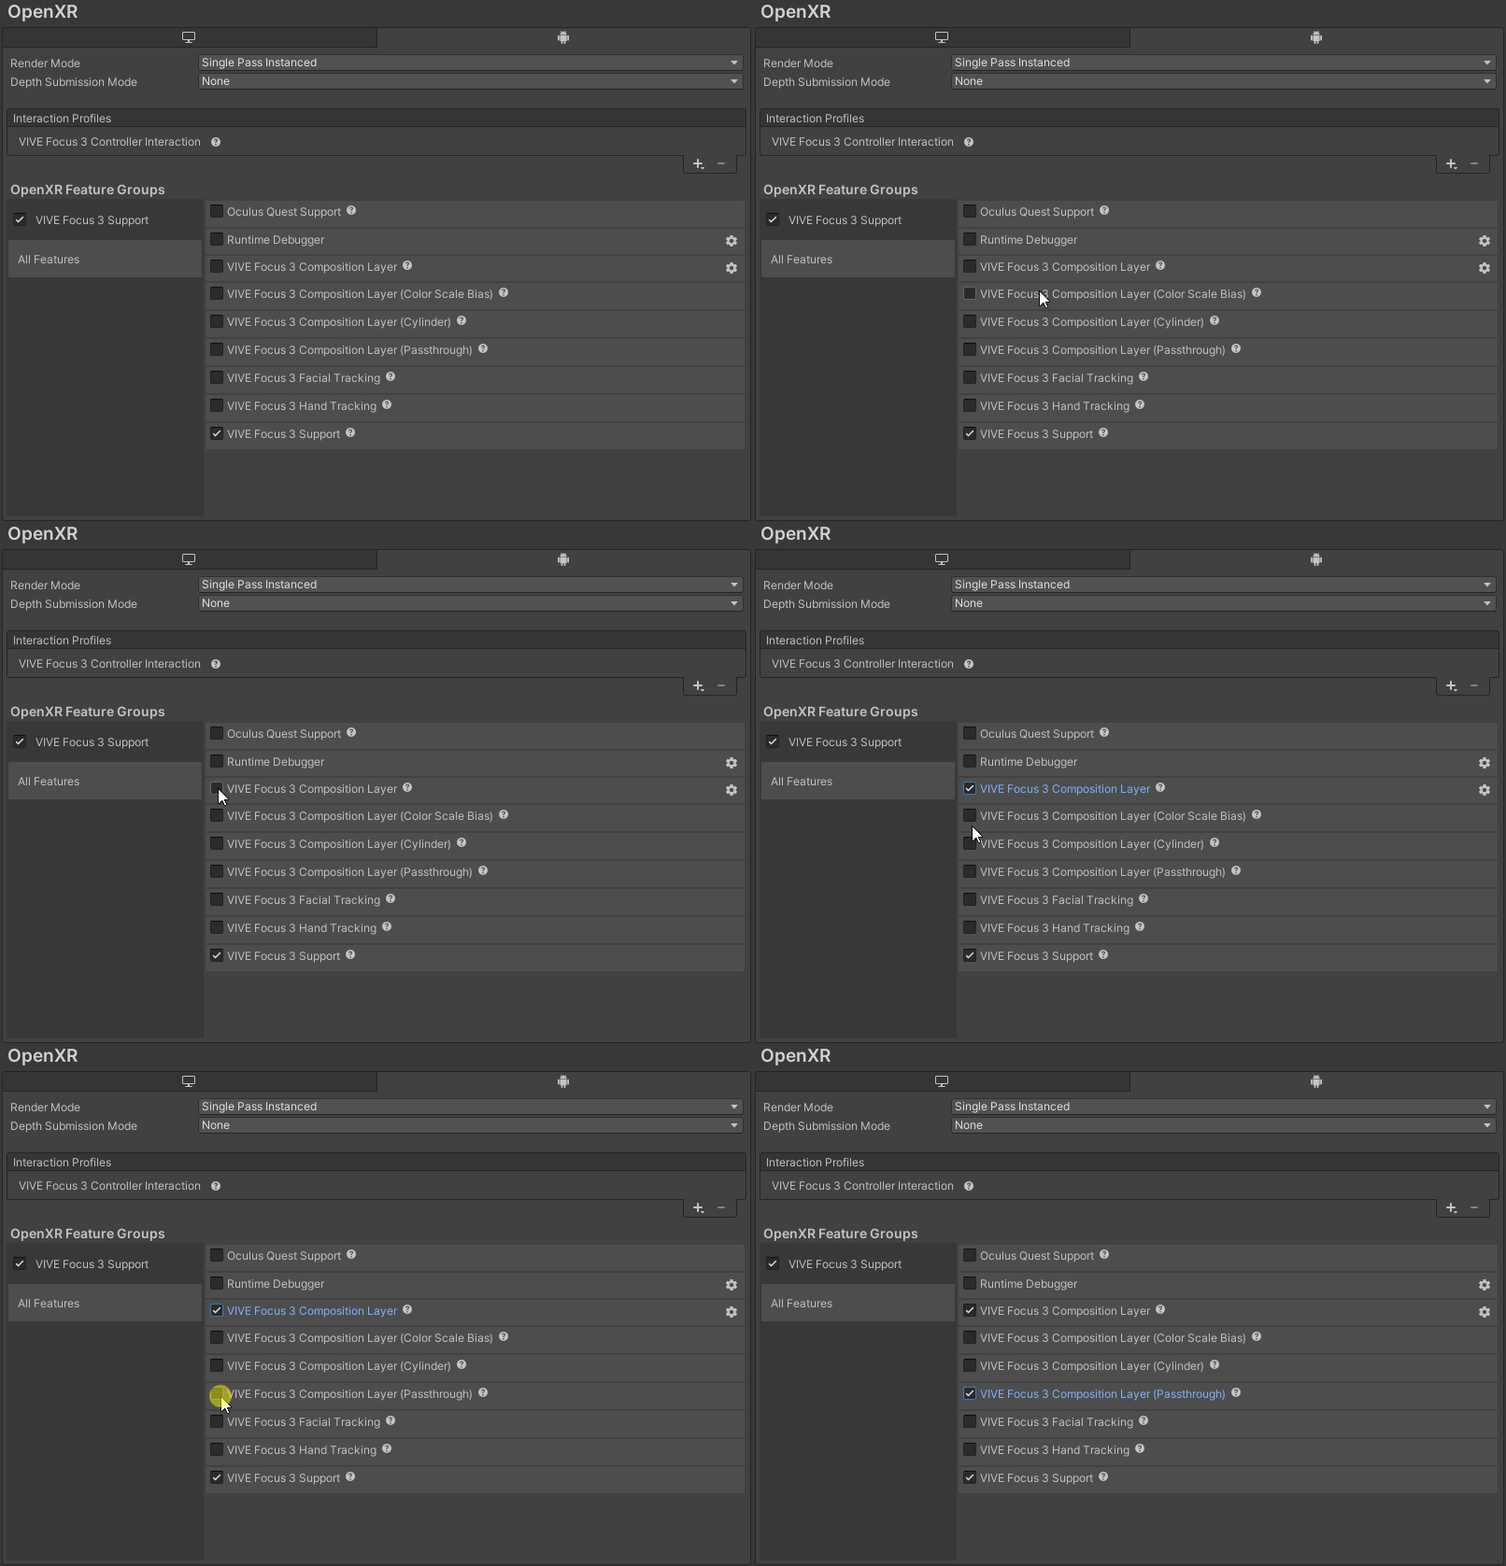
Next, Go to Edit -> ProjectSettings -> XR Plug-In Management -> OpenXR, and enable VIVE Focus 3 Composition Layer and VIVE Focus 3 Composition Layer (Passthrough).

Okay, now we are ready to use the feature. Currently, VIVE Focus 3 Composition Layer (Passthrough) allows you to create two kinds of passthrough, planar passthrough and projected passthrough. Lets see how to use them next.
Create a Planar Passthrough
A Planar passthrough is the most common type of passthrough used in XR devices. It is the type of passthrough which covers the full field of view of the player. It is often used when we want the player to see their surroundings, e.g. when the player is out of their designated play area or we are creating MR content.
To create a planar passthrough, we can use the APIs provides by VIVE Focus 3 Composition Layer (Passthrough).
Step 1. Create a .cs script
Create a .cs script and attach it to any GameObject in the scene.
Step 2. Add the necessary namespaces
In the script, add these two namespaces.
using Wave.OpenXR.Toolkit.CompositionLayer.Passthrough;
using Wave.OpenXR.CompositionLayer;
Step 3. Tell the feature to create a planar passthrough
In Start(), create a planar passthrough with the CreatePlanarPassthrough() API.
    int ID;
    void Start()
    {
        ID = CompositionLayerPassthroughAPI.CreatePlanarPassthrough(LayerType.Underlay);
    }
As the ID of the passthrough is required for modifying or controlling the passthrough, remember to store the ID returned by the function. Notice that the function asks for the layertype. The layertype can be either overlay or underlay.
Note: For a better understanding on the overlay and underlay, see Understanding overlay and underlay
Since the planar passthrough covers the whole field of view, if it is set as overlay, the player won't be able to see anything from the content.
On the other hand, if the planar passthrough is an underlay, it means the player can only see the passthrough when you “poke a hole” on the content layer. This is a typical use case for building MR experiences. We will have a further discussion about it in [Article of MR].
Step 4. Destroy the planar passthrough
Since the planar passthrough is not part of MonoBehaviour, it won’t be destroyed by Unity like other MonoBehaviour components like GameObjects. Therefore, remember to destroy the passthrough manually with the ID you got when creating the passthrough.
The following code destroys the passthrough after 10 seconds since the app is launched.
void Update()
    {
        if(Time.realtimeSinceStartup > 10)
        {
            CompositionLayerPassthroughAPI.DestroyPassthrough(ID);
        }
    }
Create a Projected Passthrough
While a planar passthrough covers the whole field of view, a projected passthrough only takes up a specific part of the view. This kind of passthrough is useful when you only want the player to see a fragment of the real world and still see most of the virtual environment. For example, you can use this kind of passthrough to let the player see the keyboard when they are typing in your application.
The projected passthrough can also be created by using APIs provided by VIVE Focus 3 Composition Layer (Passthrough).
Step 1. Create a .cs script
Create a .cs script and attach it to any GameObject in the scene.
Step 2. Add using namespaces
In the script, add these two namespaces:
using Wave.OpenXR.Toolkit.CompositionLayer.Passthrough;
using Wave.OpenXR.CompositionLayer;
Step 3. Declare a Mesh
Declare a Mesh, e.g. UsingMesh. This Mesh will be passed to the feature, where the shape of the projected passthrough will be that of the Mesh.
[SerializeField] Mesh UsingMesh;
Step 4. Declare an int, ID
Declare an int, ID. This ID serves the same purpose as the one mentioned in the planar passthrough section, which is a reference to the projected passthrough.
int ID;
Step 5. Create the passthrough
Use the CreateProjectedPassthrough() function to create a projected passthrough.
ID = CompositionLayerPassthroughAPI.CreateProjectedPassthrough(LayerType.Overlay);
Notice that the CreateProjectedPassthrough() function also requires a LayerType parameter input. If the LayerType is set to underlay, it means the passthrough can not be seen if you don’t “poke a hole” on the content layer. To see how to poke a hole on the content layer, go here[Link to partial reality], and if you are not familiar with LayerType, see [Lint to UnderstandingOverlayandUnderlay].
Step 6. Set the shape and transform of the passthrough
Use the SetProjectedPassthroughMesh() function to set the mesh (shape) of the passthrough.
int[] indices = new int[UsingMesh.triangles.Length];
        for (int i = 0; i < UsingMesh.triangles.Length; i++)
        {
            indices[i] = UsingMesh.triangles[i];
        }
        CompositionLayerPassthroughAPI.SetProjectedPassthroughMesh(ID, UsingMesh.vertices, indices, true);
        CompositionLayerPassthroughAPI.SetProjectedPassthroughMeshTranform(ID, ProjectedPassthroughSpaceType.Worldlock, Vector3.forward * 2 + Vector3.up, Quaternion.identity, Vector3.one);
and use the SetProjectedPassthroughMeshTranform() function to set the transform (position, rotation, and scale) of the passthrough.
CompositionLayerPassthroughAPI.SetProjectedPassthroughMeshTranform(ID, ProjectedPassthroughSpaceType.Worldlock, Vector3.forward * 2 + Vector3.up, Quaternion.identity, Vector3.one);
Step 7. Assign a mesh to the UsingMesh variable
In the inspector, assign the default cube mesh to UsingMesh.
Now if you run the app, you should see a passthrough with the shape of a cube in front of you.
For further details of the APIs provided by the Passthrough feature, see Here